

Easy Chicken Dishes for Busy Nights: Crispy Skillet Thighs with Lemon-Garlic Pan Sauce
Table of Contents
Last Tuesday my daughter walked in from practice, opened the fridge, and asked what was for dinner. I had a tray of chicken thighs and about forty minutes. Months earlier, my first attempt at skillet thighs had gone badly: the skin stayed pale and rubbery, and I’d cranked the heat so high the smoke alarm went off.
That failure led to the method below. It’s the recipe I now reach for when I want chicken dishes that feel like a Sunday meal on a school night. I’ve made it about a dozen times, changing one thing at a time: salting earlier, moving the pan, adjusting the oven.
The result is shatter-crisp skin, juicy meat, and a pan sauce built from the browned bits left behind. If you cook chicken dishes for a busy household, this is a dependable base to build on.
Why This Recipe Works for Chicken Dishes on Busy Nights
Bone-in, skin-on thighs are forgiving. Dark meat carries more fat and connective tissue than breast, so a few extra minutes in the oven don’t dry it out. Dark meat with the bone and skin stays more moist and juicy than boneless white meat, according to a Kitchn test of seven thigh methods. The Kitchn
The skillet-then-oven route also solves the problem I had at first. Searing on the stovetop renders the fat and crisps the skin, and the oven finishes the meat evenly without me hovering.
And because the pan sauce uses the same skillet, cleanup is one pan and a cutting board. That matters more than any fancy technique on a Tuesday.
Ingredients
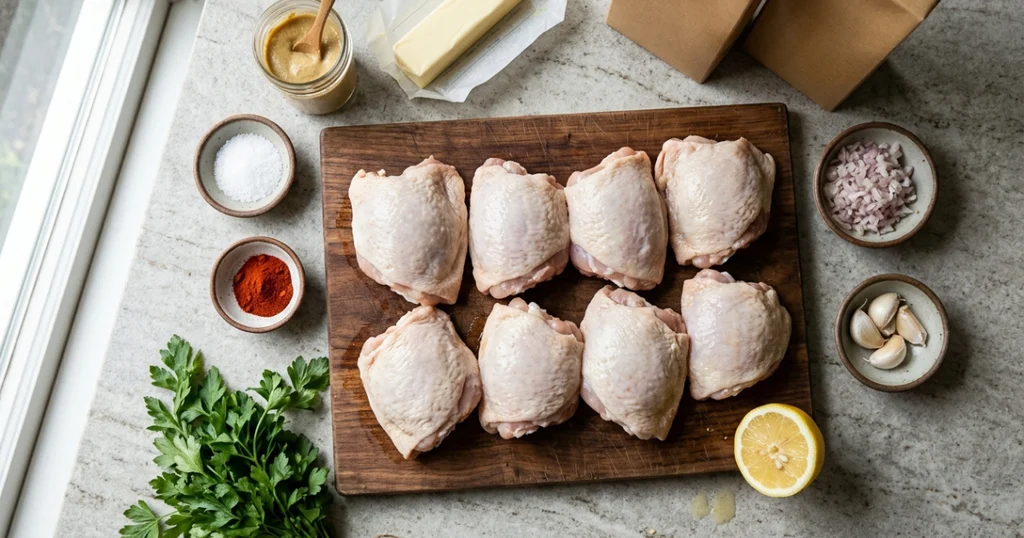
| Ingredient | Amount | Why It’s There / Substitute |
|---|---|---|
| Bone-in, skin-on chicken thighs | 8 (about 2½ lb) | Skin crisps, bone keeps meat juicy; drumsticks work too |
| Kosher salt | 1½ tsp | Seasons deeply and dries the skin; use ¾ tsp table salt |
| Black pepper | ½ tsp | Background warmth; white pepper works |
| Smoked paprika | 1 tsp | Adds color and mild smokiness; sweet paprika is fine |
| Olive oil | 1 tbsp | Prevents sticking; avocado oil handles heat well |
| Shallot, minced | 1 large | Sweet base for the sauce; use ¼ cup yellow onion |
| Garlic, minced | 4 cloves | Sauce backbone; 1 tsp garlic powder in a pinch |
| Chicken broth | ¾ cup | Deglazes the pan; water plus a bouillon cube works |
| Dijon mustard | 1 tsp | Emulsifies and adds tang; skip if needed |
| Lemon | 1 (zest and juice) | Cuts the richness; white wine vinegar, 1 tbsp |
| Butter, cold | 2 tbsp | Makes the sauce glossy; olive oil for dairy-free |
| Fresh parsley, chopped | 2 tbsp | Freshness at the end; chives or dill work |
Step-by-Step Instructions
Set aside about 30 minutes for salting, then roughly 40 minutes of cooking. Preheat the oven to 425°F (220°C) with a rack in the middle.
Cooking the Chicken
Prep the Chicken
Pat the thighs very dry with paper towels, especially the skin. Sprinkle with salt, pepper, and paprika, then let them sit on a plate for 30 minutes. Pat dry again just before cooking.
Sear
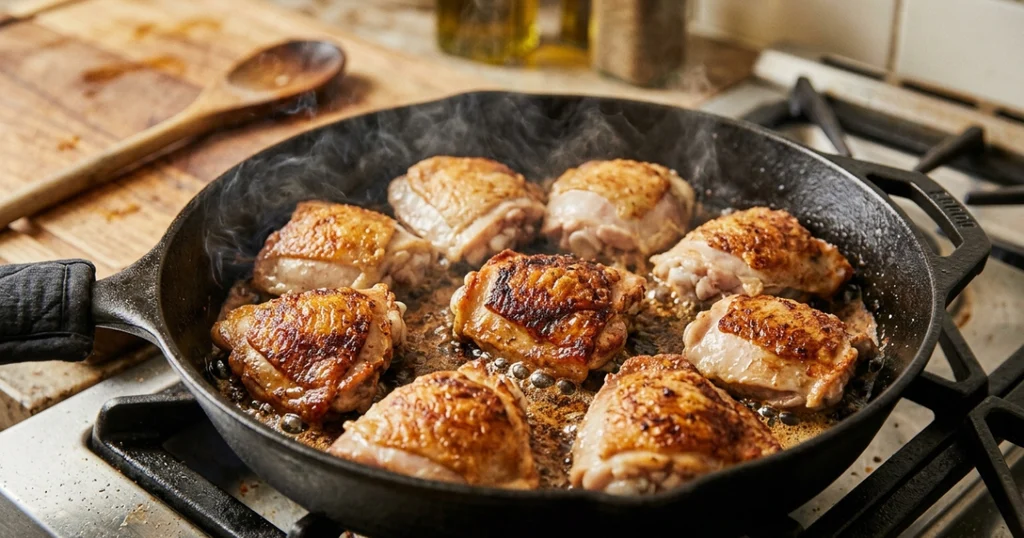
Heat the olive oil in a 12-inch oven-safe skillet over medium heat. Lay the thighs skin-side down, leaving space between them. Cook 12 to 14 minutes without moving them, until the skin is deep golden and releases easily.
If a thigh sticks, wait another minute rather than forcing it. The skin lets go when it’s ready.
Finish in the Oven
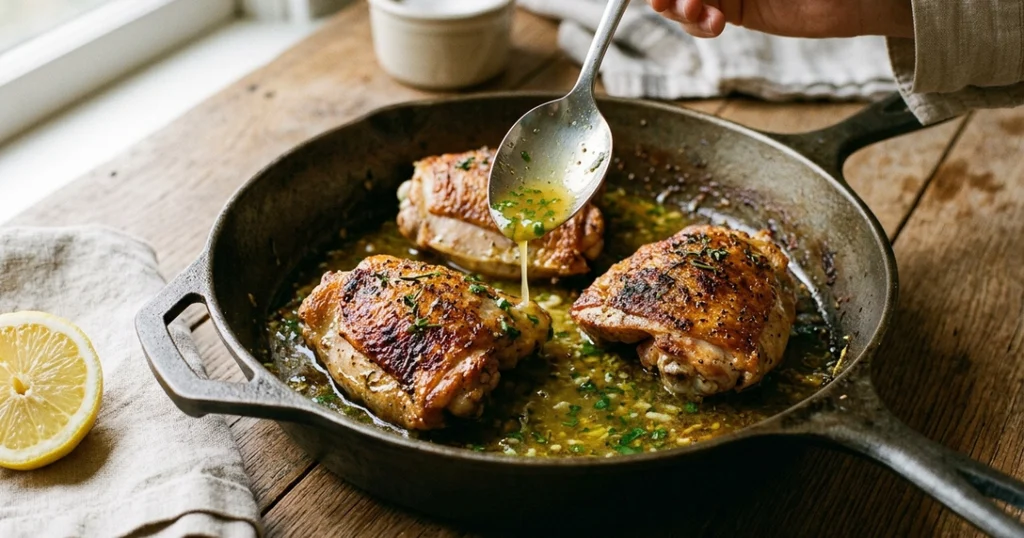
Flip the thighs so the skin faces up and slide the skillet into the oven. Roast 15 to 18 minutes. Check the thickest part with a thermometer, avoiding bone.
USDA guidance is that all poultry, including thighs, should reach 165°F (74°C), and I pull mine at 175°F or higher for tender dark meat. Details are in the USDA safe minimum internal temperature chart. foodsafety
Making the Pan Sauce
Build the Base
Move the chicken to a plate. Carefully pour off all but about 1 tablespoon of fat. The skillet handle will be very hot, so use a mitt. (I learned that one the hard way.)
Set the skillet over medium heat and add the shallot. Cook 2 minutes, then stir in the garlic for 30 seconds.
Reduce and Finish
Pour in the broth, scrape up the browned bits, and whisk in the Dijon. Simmer 4 to 5 minutes until reduced by about half. Take the pan off the heat and whisk in the cold butter, lemon zest, and 1 tablespoon of lemon juice.
Taste, adjust with more juice or salt, and spoon the sauce around the chicken, not over the skin. Scatter parsley on top.
Pro Tips & Common Mistakes
Crowding the pan. My first batch used ten thighs in a 10-inch skillet. They steamed, and the skin never crisped. Give each piece room, or cook in two batches.
Moving the chicken too soon. Poking and flipping breaks the skin and stops browning. Let the pan do its job.
Skipping the thermometer. Color and juices are unreliable. A $12 instant-read thermometer has saved more of my chicken dishes than any technique.
Sauce on crisp skin. Pouring sauce over the top turns the skin soft in minutes. Spoon it underneath instead.
Cooking on high heat. Medium heat renders fat gradually. Higher heat burns the skin before the fat melts out, which is what set off my smoke alarm.
Variations & Substitutions
Once you know the base method, it adapts to many chicken dishes.
- Cajun cream version: Skip the lemon sauce and spoon over a peppery Cajun cream sauce. The key is simmering the cream gently rather than boiling it, which keeps the sauce silky instead of separated.
- Herb and mustard: Add a tablespoon of whole-grain mustard and fresh thyme to the sauce.
- Spicy honey: Toss the finished thighs with 1 tablespoon honey mixed with red pepper flakes.
- Boneless thighs: Sear 5 to 6 minutes per side and skip the oven. The skin won’t be crisp, but the meat cooks quickly.
- Ground chicken night: If you’d rather use a different cut, try one of these budget-friendly ground chicken dinners, which come together in about 30 minutes.
Storage, Reheating & Make-Ahead
Cool the chicken within two hours, then store thighs and sauce in separate airtight containers. They keep 3 to 4 days in the fridge.
To reheat, place the thighs skin-side up on a rack in a 375°F oven for 15 to 20 minutes, until they reach 165°F. This keeps the skin much crispier than a microwave. Warm the sauce gently on the stove.
For make-ahead, salt the thighs up to 24 hours in advance and leave them uncovered in the fridge. The skin dries out and crisps better. Cooked thighs freeze for up to 3 months, though I’d freeze the sauce separately.
Serving Suggestions
I serve these thighs over buttery mashed potatoes or with roasted green beans. Rice, lemony couscous, or a simple arugula salad also soak up the sauce well.
For a family-style dinner, add crusty bread and a big tray of roasted carrots. If dessert matters, a spoonful of homemade peach pie filling over vanilla ice cream finishes the meal without extra baking.
Chicken Dishes FAQ
Can I make this recipe with boneless, skinless thighs?
Yes. Sear them 5 to 6 minutes per side until they reach 165°F, then make the sauce as written. The meat will be tender but you won’t get crisp skin.
How long does cooked chicken last in the fridge?
Cooked chicken keeps 3 to 4 days in an airtight container. Reheat it to 165°F before eating.
What’s the difference between bone-in and boneless thighs?
Bone-in thighs cook more slowly and stay juicier, and the skin crisps. Boneless thighs cook faster and suit stir-fries, but they lose the skin and some moisture.
Do I need a cast iron skillet for chicken dishes like this?
No. Any heavy, oven-safe skillet works. Avoid nonstick pans that aren’t rated for 425°F.
Why isn’t my chicken skin crispy?
The usual causes are wet skin, a crowded pan, or moving the chicken too early. Pat it dry, salt ahead of time, and let it sear untouched.
Can I freeze cooked chicken thighs?
Yes, for up to 3 months. Thaw overnight in the fridge and reheat in the oven for the best texture.
Conclusion
This is the recipe that changed how I make chicken dishes at home: dry the skin, keep the heat moderate, trust the thermometer, and let one skillet do the work. It takes about 45 minutes and rewards patience more than skill.
Make it once as written, then try one of the variations. By the second time, you’ll likely have your own version.
Written by Oussama Ij , home cook and food writer.