

Best Homemade Oreo Cookies Recipe You’ll Ever Try
Table of Contents
My younger sister called me one Sunday afternoon and asked if I could bring “something chocolate” to her daughter’s birthday party the following weekend. I immediately thought of oreo cookies — they’re universally loved, portable, and exactly what a room full of eight-year-olds wants. The problem? I’d never made them from scratch, and I figured homemade would be more impressive than a blue package from the grocery store.
My first batch was a disaster. The wafers spread too thin, the edges burned while the centers stayed soft, and the filling was so sweet it made my teeth ache. I was genuinely embarrassed. But after three more test rounds across two weekends, I cracked it. The secret is chilling the dough properly and using Dutch-process cocoa, which gives that deep, almost-black color and the faintly bitter edge that makes oreo cookies so craveable. These homemade oreo cookies turned out so good that my niece asked her mom why they didn’t always taste “this real.”
Why This Recipe Works
Most copycat oreo cookie recipes miss the mark because they use natural cocoa powder, which produces a brown cookie with a milder flavor. Dutch-process cocoa is alkalized, giving the wafers that signature nearly-black color and a smooth, less acidic taste — exactly what makes oreo cookies distinctive.
The second thing I got right on my fourth attempt: resting the dough in the fridge for at least 45 minutes. Skipping that step causes the cookies to spread and lose their crisp, snappy texture. The cold fat holds its shape in the oven. And using a piped filling — not just spooned — means every sandwich gets an even layer that doesn’t squish out the side when you bite down.
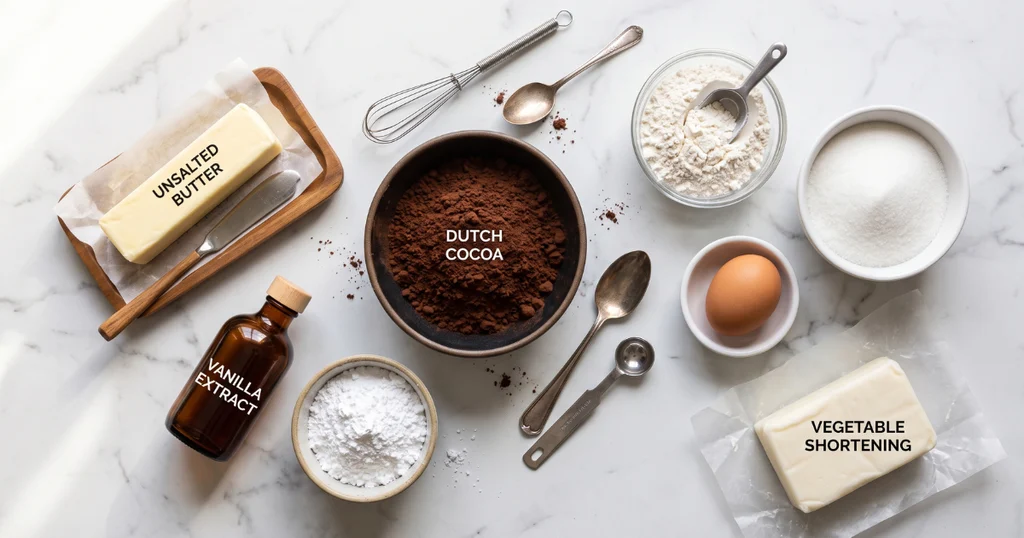
Ingredients
Chocolate Wafers
| Ingredient | Amount | Why It’s There / Substitute |
|---|---|---|
| All-purpose flour | 1 ½ cups (190g) | Structure; bread flour makes them too tough |
| Dutch-process cocoa powder | ½ cup (50g) | Dark color and rich flavor; don’t swap for natural cocoa |
| Baking soda | ½ tsp | Slight lift and spread control |
| Fine salt | ¼ tsp | Balances sweetness; don’t skip |
| Unsalted butter, cold | ½ cup (113g) | Flakiness; salted butter works if you reduce salt |
| Granulated sugar | ¾ cup (150g) | Sweetness and crunch |
| Large egg | 1 | Binds the dough |
| Vanilla extract | 1 tsp | Depth; imitation vanilla is fine here |
Cream Filling
| Ingredient | Amount | Why It’s There / Substitute |
|---|---|---|
| Unsalted butter, room temp | ½ cup (113g) | Creamy base; vegan butter works well |
| Vegetable shortening | ¼ cup (48g) | Stabilizes filling; all-butter filling is softer |
| Powdered sugar, sifted | 2 cups (240g) | Sweetness and body; don’t reduce or it won’t hold |
| Vanilla extract | 1 tsp | Classic flavor; clear vanilla keeps filling bright white |
| Heavy cream | 1–2 tbsp | Adjusts consistency; milk works too |
| Fine salt | 1 pinch | Cuts the sweetness |
Step-by-Step Instructions
Make the Chocolate Wafers
Mix the Dry Ingredients
- Whisk together the flour, Dutch-process cocoa, baking soda, and salt in a medium bowl. Set aside.
Cream Butter and Sugar
- Beat the cold butter and granulated sugar together in a stand mixer fitted with the paddle attachment on medium speed for about 3 minutes, until the mixture looks pale and slightly fluffy. Cold butter is intentional — it gives the cookies a firmer snap.
- Add the egg and vanilla, and beat another 30 seconds until just combined.
Bring the Dough Together
- Add the flour mixture all at once and mix on low until the dough just comes together — about 1 minute. It will look crumbly at first; keep going and it’ll form a cohesive dough.
- Turn it out onto a piece of plastic wrap, shape into a flat disc, and refrigerate for at least 45 minutes. You can leave it overnight.
Roll and Cut
- Preheat your oven to 350°F (175°C) and line two baking sheets with parchment.
- Roll the dough between two sheets of parchment to ⅛ inch (3mm) thickness. If it cracks, let it sit at room temperature for 5 minutes — it just needs to soften slightly.
- Cut with a 2-inch round cutter. Re-roll scraps once. You should get about 40 rounds.
Bake
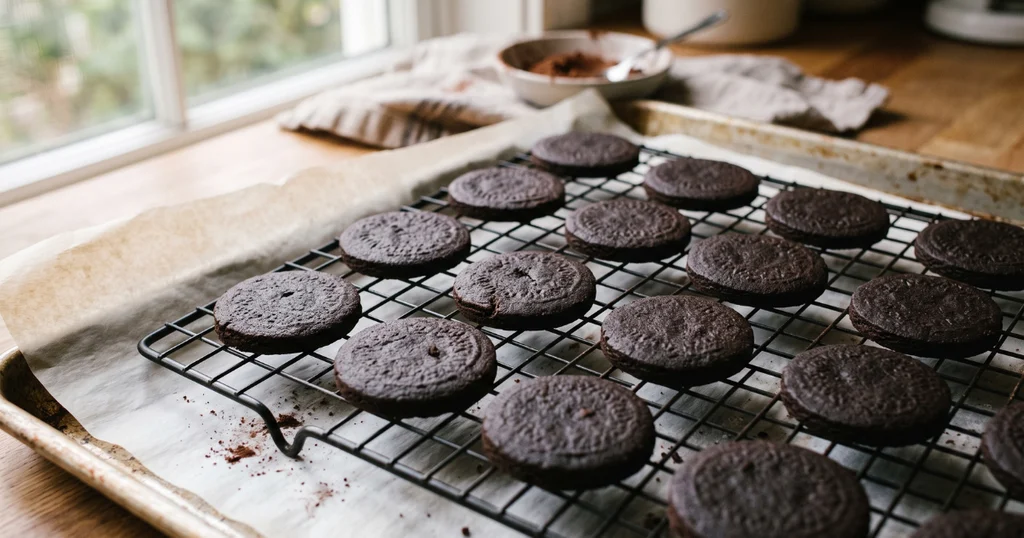
- Arrange the rounds 1 inch apart on the prepared baking sheets. Bake for 10–11 minutes — the cookies will look matte and slightly firm at the edges. They’ll still feel soft right out of the oven but will crisp up completely as they cool.
- Cool on the pan for 5 minutes, then transfer to a wire rack. Don’t rush this — sandwiching warm oreo cookies melts the filling.
Make the Cream Filling
Beat the Base
- Beat the butter and shortening together on medium-high speed for 2 minutes until light and fluffy.
- Add the sifted powdered sugar in two additions, beating well after each.
Adjust Consistency
- Add the vanilla, salt, and 1 tablespoon of cream. Beat on high for 1 minute until the filling is smooth, bright white, and holds a stiff peak. Add the second tablespoon of cream only if it looks too thick to pipe.
Assemble the Oreo Cookies
- Transfer the filling to a piping bag fitted with a round tip (or a zip-lock bag with one corner snipped off).
- Pipe about 1 teaspoon of filling onto the flat side of one wafer, then press a second wafer on top — flat side down — with gentle, even pressure until the filling just reaches the edges.
- Repeat with all remaining oreo cookies. Let them set at room temperature for 30 minutes before serving so the filling firms up slightly.
Pro Tips & Common Mistakes
Don’t skip chilling the dough. The first time I made these, I was impatient and skipped the rest. The cookies spread thin, browned unevenly, and lost that crisp bite that makes oreo cookies satisfying. Forty-five minutes in the fridge is a minimum.
Sift the powdered sugar. Lumpy filling ruins the texture. Sifting takes two minutes and makes the filling silky smooth.
Roll consistently thin. Uneven thickness means some oreo cookies overbake while others stay underdone. Take the extra minute to check with a ruler or use rolling pin guides.
Don’t overbake. These look underdone when you pull them — trust the timer. Overbaked wafers turn bitter because of the cocoa.
Weigh your ingredients. Especially the flour and cocoa. A packed cup of flour will make the dough stiff and hard to roll.
Variations & Substitutions
Mint oreo cookies: Add ½ teaspoon of peppermint extract to the filling and use clear vanilla to keep it white.
Golden oreo style: Swap the Dutch-process cocoa for an extra ¼ cup of flour and add 1 tablespoon of brown sugar for a vanilla sandwich cookie.
Double Stuf style: Pipe 2 teaspoons of filling per sandwich instead of one.
Gluten-free: Replace the all-purpose flour with a 1:1 gluten-free baking blend. The texture is slightly more delicate but still delicious.
Vegan oreo cookies: Use vegan butter in both the wafers and filling, vegetable shortening in the filling, and a flax egg (1 tablespoon ground flax + 3 tablespoons water, rested 5 minutes) instead of the egg.
Storage, Reheating & Make-Ahead
At room temperature: Store assembled oreo cookies in an airtight container for up to 5 days. They actually get better on day two as the filling softens the wafer slightly.
Refrigerator: Up to 2 weeks in an airtight container. Let them come to room temperature for 10 minutes before eating — cold filling can be a bit too firm.
Freezer: Freeze assembled oreo cookies in a single layer, then transfer to a freezer bag for up to 3 months. Thaw overnight in the fridge or 20 minutes at room temperature.
Make-ahead tips: The rolled, cut dough rounds can be frozen unbaked for up to 1 month — bake straight from frozen, adding 2 minutes to the bake time. The filling can be made 3 days ahead and stored covered in the fridge; re-whip before using.
Serving Suggestions
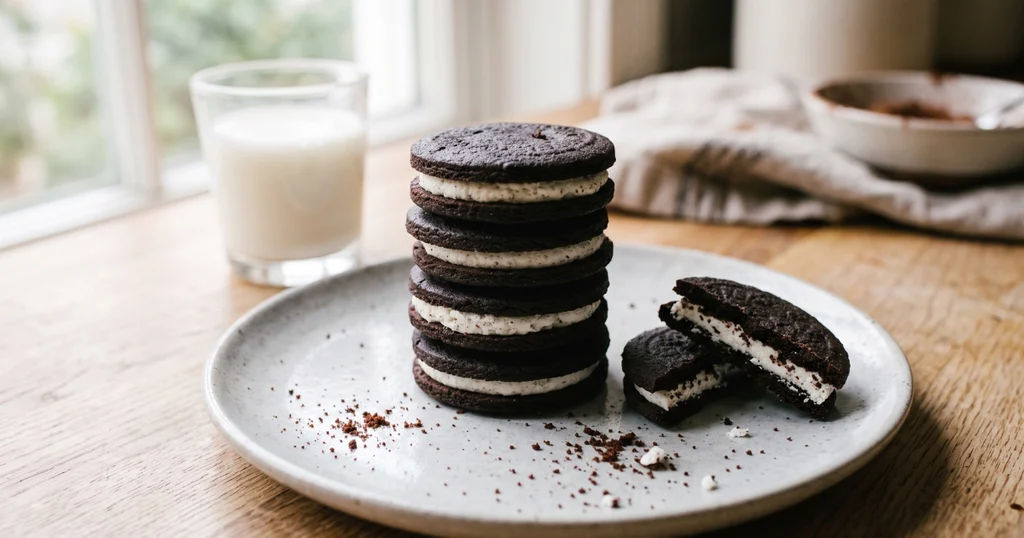
Serve these homemade oreo cookies with cold milk — that’s the classic for a reason. They’re also fantastic crumbled over vanilla ice cream, layered into an icebox cake with whipped cream, or used as the crust for a no-bake cheesecake. For a party spread, stack them in a clear jar tied with ribbon — they look impressive and travel well.
They pair beautifully alongside other chocolate desserts. If you love rich chocolate flavors, try pairing these with a slice of dark chocolate cream pie.
FAQ
Can I use natural cocoa powder instead of Dutch-process?
You can, but the flavor and color will be noticeably different — lighter brown, more acidic, less intense. If natural cocoa is all you have, add ¼ teaspoon of baking powder to help neutralize the acidity and deepen the color slightly.
How long do homemade oreo cookies stay fresh?
At room temperature in an airtight container, they stay crisp and fresh for up to 5 days. In the freezer, they last up to 3 months without losing quality.
Can I make the dough ahead of time?
Yes — the dough keeps in the fridge for up to 3 days or in the freezer for 1 month. Wrap it tightly in plastic wrap either way.
What’s the difference between Dutch-process and regular cocoa powder?
Dutch-process cocoa has been treated with an alkali to neutralize its natural acidity. According to Serious Eats’ guide on cocoa powder, this produces a darker color, smoother flavor, and better moisture absorption — all qualities that matter for oreo cookies.
Why is my filling too soft?
Two likely culprits: the butter was too warm when you started beating, or you added too much cream. If the filling is already made and too soft, refrigerate it for 15 minutes and beat it again briefly. The shortening ratio also helps — if you skipped it, the filling will be softer and melt faster.
Can I add color to the filling?
Absolutely. Gel food coloring works best — liquid coloring can thin the filling too much. Add it a drop at a time after the filling is fully mixed.
Conclusion
Making oreo cookies from scratch was one of those projects that humbled me before it rewarded me. The failed first batch taught me everything I needed to know about chilled dough and proper cocoa. Now I make these for every occasion where I want something people actually get excited about. There’s something genuinely satisfying about handing someone a cookie that looks familiar but tastes noticeably more real. Give these a try — I think you’ll feel the same way.
Written by Oussama Ij, home cook and food writer.