
Easy Chocolate Bun Recipe: Soft, Fluffy & Bakery-Style
Table of Contents
There are certain smells that pull you backward in time before your brain even registers what’s happening. For many of us, it’s warm chocolate dough rising in a sunlit kitchen — the kind of scent that belonged to a grandmother’s house, a corner bakery you passed every school morning, or a hotel breakfast spread that ruined all future Saturdays.
That memory. That pull. That moment when a warm, pillowy bun lands in your hand and the chocolate is still soft and gooey inside.
What if you could recreate that — any morning, in your own kitchen — without culinary school, a professional oven, or a drawer full of specialty equipment?
This easy chocolate bun recipe is the answer. It’s built for real people with real kitchens and real schedules. Whether you’re an occasional home baker or someone who’s never made yeasted dough before, you’ll walk away from this guide with soft, fluffy, bakery-style chocolate buns that look impressive and taste even better.
Let’s get into it.
What Makes This Easy Chocolate Bun Recipe Worth Your Time?
Not every chocolate bun recipe is created equal. A lot of them are dry by the next morning, too dense in the crumb, or so complicated they require a three-hour YouTube tutorial just to understand the shaping step.
This recipe cuts through all of that. Here’s what sets it apart:
⦁ No stand mixer needed — the dough is hand-kneadable in under 10 minutes
⦁ Ready in under 2.5 hours from start to finish, including both rise times
⦁ Built with pantry staples — nothing you’d need to hunt down at a specialty store
⦁ Stays genuinely soft for up to 3 days at room temperature
⦁ Fully freezer-friendly, so you can prep ahead and bake on demand
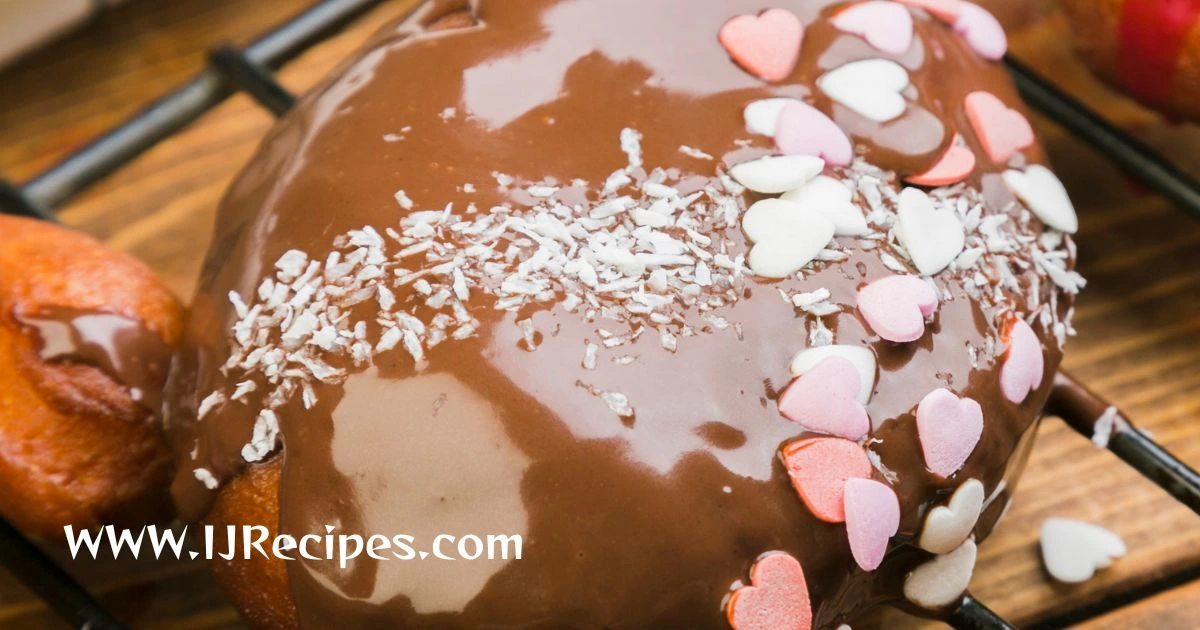
The result is a pull-apart bun with a tender, rich crumb, a deep cocoa aroma, and a chocolate filling that melts into every layer. It’s the kind of bake that makes people think you’ve been at it since 5 a.m., when in reality you started after your second cup of coffee.
Ingredients You’ll Need
Before you touch a bowl or turn on your oven, gather everything first. Baking rewards preparation. Below are the full ingredient lists, broken into three components: the dough, the filling, and the optional glaze.
The Dough
Ingredient Quantity Notes / Substitutions
Bread flour (or all-purpose) 3 cups / 360g Bread flour gives a chewier, fluffier result
Unsweetened cocoa powder 3 tbsp / 22g Dutch-process for deeper color and flavor
Granulated sugar 1/4 cup / 50g Adjust slightly to taste
Active dry yeast 2 1/4 tsp / 7g One standard packet; instant yeast also works
Warm whole milk 3/4 cup / 180ml 105-115°F / 40-46°C to properly activate yeast
Unsalted butter 4 tbsp / 57g Softened; adds richness and keeps dough tender
Egg 1 large Bring to room temperature before using
Salt (1/2 tsp) – Enhances and balances all the flavors.
Vanilla extract 1 tsp Optional but noticeably improves the aroma
The Chocolate Filling
Ingredient Quantity Notes
Semi-sweet chocolate chips 1/2 cup / 85g Or chopped dark chocolate, 60-70% cacao
Unsalted butter, melted 2 tbsp / 28g Helps the filling spread evenly
Unsweetened cocoa powder 1 tbsp Deepens the chocolate richness in the filling
Brown sugar 2 tbsp Adds a caramel undertone that pairs beautifully with cocoa
The Glaze (Optional but Recommended)
Ingredient Quantity Notes
Dark chocolate, chopped 50g Melt for a smooth ganache drizzle
Heavy cream 2 tbsp Mix with chocolate for glossy consistency
Powdered sugar 1/4 cup Simple alternative if skipping the ganache
Equipment You’ll Need
You don’t need much. Here’s what to have ready before you start:
⦁ Large mixing bowl
⦁ Kitchen scale (strongly recommended over cup measurements)
⦁ Rolling pin
⦁ 9×13-inch baking pan or round 9-inch cake pan
⦁ Instant-read kitchen thermometer (for milk temp and doneness)
⦁ Bench or dough scraper
⦁ Pastry brush (for butter wash after baking)
⦁ Clean kitchen towel or plastic wrap for proofing
If you have a stand mixer with a dough hook, you can absolutely use it — just knead on medium speed for 6 minutes instead of 8-10 by hand. Either way produces excellent results.
How to Make This Easy Chocolate Bun Recipe — Step by Step
Follow each step in sequence. The sensory cues are there to help you know when you’re on track — baking by feel is just as important as baking by timer.
Step 1 — Activate the Yeast (5 Minutes)
Warm your milk to between 105°F and 115°F. Stir in a pinch of the sugar and the yeast, then leave it undisturbed for 5 to 10 minutes. You’re looking for a foamy, cloud-like surface — that’s your signal that the yeast is alive and working. If nothing happens after 10 minutes, your yeast is dead or your milk was too hot. Start fresh; there’s no rescuing it at this stage.
Step 2 — Build the Chocolate Dough (10 Minutes)
In a large bowl, whisk together your flour, cocoa powder, sugar, and salt. Pour in the yeast mixture, add the egg, softened butter, and vanilla extract. Mix until a shaggy dough comes together, then turn it out onto a lightly floured surface.
Knead for 8 to 10 minutes until the dough is smooth, elastic, and only slightly tacky. To check if it’s ready, stretch a small piece between your fingers — it should hold a thin, translucent window without tearing. This is called the windowpane test, and it tells you the gluten is properly developed.
Step 3 — First Rise (1 Hour)
Form the dough into a ball and set it in a lightly oiled bowl. Cover with plastic wrap or a damp towel and let it rise somewhere warm until it has doubled in size — roughly 1 hour. A great trick: preheat your oven to its lowest setting for 2 minutes, then turn it off and use that residual warmth as a proofing chamber. The dough is ready when a poke leaves a slow, shallow indent that springs back just slightly.
Step 4 — Shape the Buns (15 Minutes)
Punch the dough down gently and turn it onto a floured surface. Roll it into a rectangle roughly 12 by 9 inches. Spread the chocolate filling evenly across the surface, leaving a half-inch border on the far long edge. Roll the dough into a tight log starting from the near edge, then cut it into 12 equal pieces using unflavored dental floss or a sharp serrated knife — the floss method avoids compressing the swirls. Arrange the pieces cut-side up in your baking pan with a small gap between each one.
Step 5 — Second Rise (30–45 Minutes)
Cover the pan loosely and let the buns puff again until they’re touching and noticeably taller. Don’t skip this step — it’s what gives your buns that signature pull-apart texture that differentiates a bakery bun from a dense, chewy roll. Preheat your oven to 350°F / 175°C during this time.
Step 6 — Bake (20–25 Minutes)
Bake until the tops look set and the internal temperature reads 190°F / 88°C. Don’t wait for deep golden color — if you’re chasing a golden-brown surface, you’ve likely already overbaked them. Pale tops equal soft buns. The moment they come out of the oven, brush the tops generously with softened butter. This seals in moisture and gives them that glossy, bakery-quality finish.
Step 7 — Glaze and Serve
Let the buns cool for 10 minutes before glazing. Drizzle the ganache or simple sugar glaze over the top while they’re still warm. Serve immediately for the best experience — that first pull-apart moment is something worth pausing for.
Pro Tips for Soft, Fluffy Bakery-Style Results
Use the Tangzhong Method for Extended Softness
This Japanese technique involves cooking 2 tablespoons of flour with 1/2 cup of milk over low heat until it forms a thick paste. Add this to your dough before kneading. It locks moisture into the crumb in a way that keeps your buns soft for an extra day or two beyond the standard recipe. It adds 5 minutes and is absolutely worth it.
Always Bring Dairy and Eggs to Room Temperature
Cold butter or a cold egg dropped into active yeast dough can stall fermentation. Pull everything out of the refrigerator at least 30 minutes before you start mixing. This one habit eliminates half the common problems people run into with enriched doughs.
Never Refrigerate Your Finished Buns
The fridge dries baked goods out rapidly. If you’re not eating them within a few hours, store them in an airtight container at room temperature. They’ll stay soft for 2 to 3 days. For longer storage, freeze them individually wrapped in plastic wrap, then thaw at room temperature and rewarm in the microwave under a damp paper towel for 15 to 20 seconds.
Common Mistakes to Avoid
- Over-proofing the dough — buns will collapse or have a sour flavor
- Overheating the milk above 120°F, which kills the yeast on contact
- Overbaking while chasing color — pull them early and trust the thermometer
- Using stale cocoa powder — fresh cocoa makes a striking difference in aroma and taste
- Skipping the second rise — this is not optional if you want a fluffy crumb
Variations to Try Next Time
Once you’ve nailed the base recipe, the variations are where things get genuinely fun. Here are five worth bookmarking:
⦁ Double Chocolate: Fold chocolate chips directly into the dough for extra pockets of melted chocolate throughout the crumb
⦁ Chocolate Orange: Add 1 tablespoon of fresh orange zest to the filling — the citrus cuts through the richness beautifully
⦁ Chocolate Peanut Butter Swirl: Spread a thin layer of natural peanut butter under the chocolate filling before rolling
⦁ Chocolate Raspberry: Layer seedless raspberry jam beneath the chocolate filling for a fruity contrast
⦁ Mexican Hot Chocolate: Add 1/2 teaspoon cinnamon and a small pinch of cayenne to the cocoa dough for a warm, spiced finish
How to Store and Reheat Your Chocolate Buns
Storage Method Duration Best Practice
Room Temperature 2-3 days Airtight container; never refrigerate — it dries them out
Refrigerator Up to 1 week Wrap individually; expect slightly drier texture
Freezer (baked) Up to 3 months Wrap in plastic + foil; thaw at room temp before reheating
Freezer (unbaked) Up to 1 month Freeze after shaping; thaw overnight, proof 1 hr, then bake
Frequently Asked Questions About Easy Chocolate Bun Recipe
Can I make this easy chocolate bun recipe without yeast?
You can make a no-yeast version using self-rising flour and Greek yogurt for a quick dough, but the result is noticeably denser and closer to a scone than a traditional bun. If you want that light, fluffy, pull-apart texture that defines a bakery-style chocolate bun, yeast is non-negotiable. Instant yeast works just as well and skips the proofing step.
Why are my chocolate buns dense instead of fluffy?
Dense buns typically come down to one of three things: dead yeast (check the water temperature and the expiration date on your packet), under-kneaded dough (the gluten hasn’t developed enough to trap the gas from fermentation), or a skipped second rise. Run through that checklist and you’ll pinpoint the issue on your next batch.
How far in advance can I prepare these buns?
You can shape the buns the night before, cover them tightly, and refrigerate them after the second rise begins. The next morning, bring them to room temperature for 30 to 60 minutes, then bake as directed. This slow, cold proof actually develops a slightly deeper flavor in the dough — it’s a great weekend meal-prep strategy.
What type of chocolate is best for the filling in this easy chocolate bun recipe?
Semi-sweet or bittersweet chocolate in the 60 to 70 percent cacao range delivers the best depth of flavor without overwhelming sweetness. Milk chocolate is a great kid-friendly option. Avoid white chocolate in the filling — it tends to burn at the temperatures required to bake enriched dough.
How do I keep my chocolate buns soft for longer?
Three habits make the biggest difference: don’t overbake (pull them at 190°F internal temperature, not by color), brush them with butter the moment they come out of the oven, and store in an airtight container at room temperature. Adding a tablespoon of neutral oil to the dough alongside the butter also extends softness by an additional day.
Is this recipe kid-friendly enough for children to help prepare?
Absolutely. This easy chocolate bun recipe is one of the better options for baking with children because the dough is forgiving and fun to work with. Kids can help measure, mix, knead, shape, and decorate. Reserve all oven handling for adults. The whole process becomes a great sensory and learning experience for younger bakers.
Your Best Chocolate Buns Are One Bake Away
Here’s the truth about this easy chocolate bun recipe: it’s not just a recipe. It’s proof that bakery-quality baking is fully within your reach, with ingredients you already own and time you already have on a slow morning.
The softness, the pull-apart crumb, the deep chocolate aroma filling your kitchen — none of that requires professional equipment or years of experience. It just requires showing up, following the steps, and giving the dough the time it needs.
Once you bake these the first time, you’ll understand why this recipe gets passed around. It’s the kind of thing people screenshot, text to friends, and come back to every weekend.
Ready to give it a go? Save this recipe, share it with someone who deserves a good Saturday morning, and drop a comment telling us which variation you tried first. We genuinely want to hear how yours turned out.
Happy Baking!