
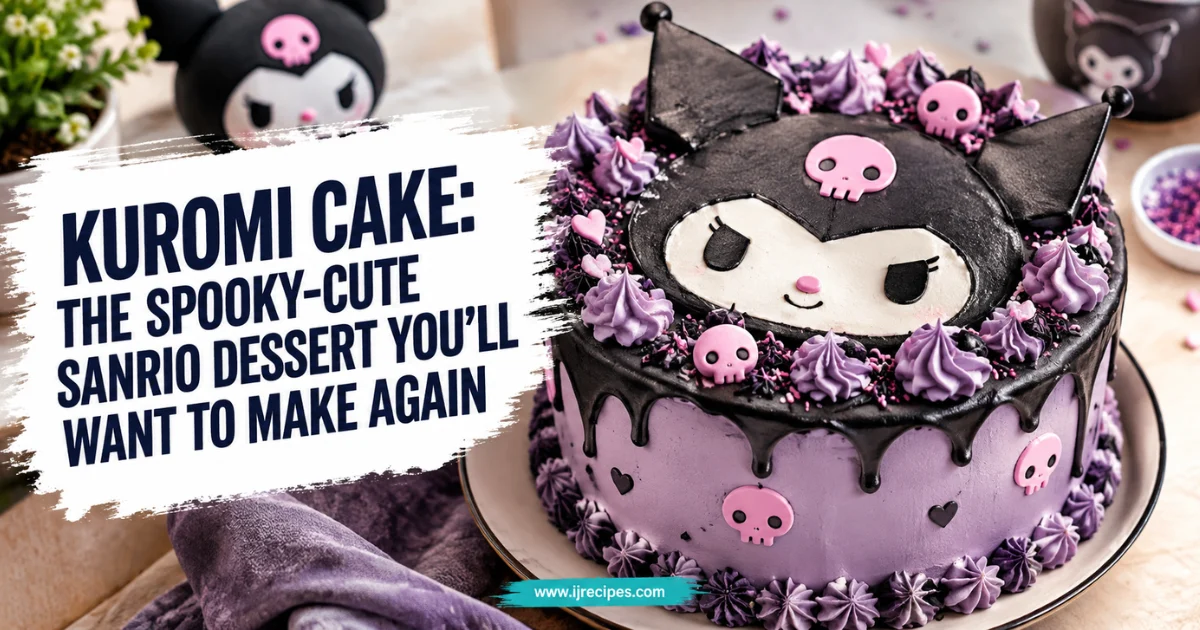
Kuromi Cake: The Spooky-Cute Sanrio Dessert You’ll Want to Make Again
Table of Contents
My niece turned eight last spring and declared, with zero room for negotiation, that she wanted a kuromi cake. Not a purple cake, not a “black and pink cake” — a Kuromi cake, complete with the little skull, the jester hat, and those signature pink eyes. I had exactly five days, one layer cake pan, and a very healthy fear of fondant. What followed was genuinely one of my most chaotic — and most rewarding — baking weekends.
This kuromi cake recipe is the version I landed on after two test batches, one fondant disaster (more on that later), and approximately four hours of watching decorating videos on my phone while my coffee went cold. The cake itself is a soft vanilla sponge with a hint of almond, filled with a whipped strawberry buttercream, and finished in jet-black vanilla frosting. It tastes as good as it looks, which honestly surprised me the first time.
Why This Kuromi Cake Recipe Actually Works
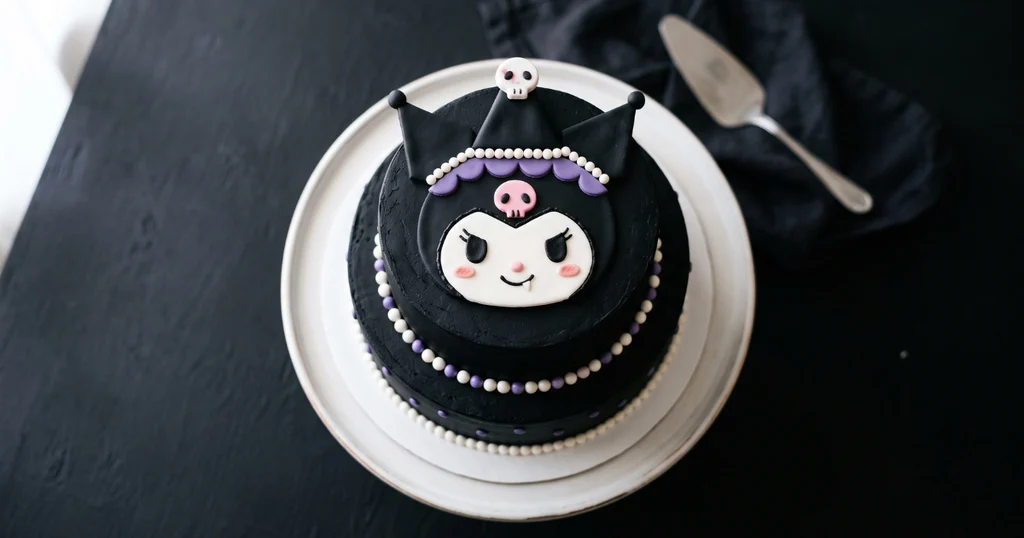
Most character cake tutorials I found online leaned hard on box mixes and pre-made decorations. Nothing wrong with that — but I wanted something that tasted homemade, because that’s the whole point of making it yourself.
The vanilla sponge here uses both butter and a splash of oil. Butter gives you flavor; oil keeps the crumb moist for days, which matters when you’re decorating over two days and the cake needs to sit in the fridge. The strawberry filling is light and not too sweet, which balances the very bold black frosting. And the fondant decorations are kept minimal — just Kuromi’s face details — so you don’t need to be a professional decorator to pull this off.
I tested this cake twice: once with all-butter frosting (too dense, it cracked when I crumb-coated) and once with the butter-shortening hybrid I’m sharing below. The second version was dramatically easier to work with.
Ingredients
For the Vanilla Sponge Layers
| Ingredient | Amount | Why It’s There / Substitute |
|---|---|---|
| All-purpose flour | 2½ cups | Base structure; cake flour for a softer crumb |
| Baking powder | 2½ tsp | Lift and rise |
| Salt | ½ tsp | Balances sweetness |
| Unsalted butter, softened | ½ cup | Flavor and richness |
| Neutral oil (sunflower/canola) | ¼ cup | Keeps crumb moist for days |
| Granulated sugar | 1¾ cups | Sweetness; don’t reduce or the crumb dries |
| Large eggs | 4 | Structure and richness |
| Pure vanilla extract | 2 tsp | Core flavor |
| Almond extract | ¼ tsp | Subtle depth; omit if nut allergy |
| Whole milk | 1 cup | Hydrates batter; buttermilk for tang |
| Sour cream | ¼ cup | Tenderness and a slight tang |
For the Strawberry Buttercream Filling
| Ingredient | Amount | Why It’s There / Substitute |
|---|---|---|
| Unsalted butter, softened | 1 cup | Creamy base |
| Powdered sugar, sifted | 3 cups | Structure and sweetness |
| Freeze-dried strawberry powder | 3 tbsp | Intense flavor without extra moisture |
| Heavy cream | 2–3 tbsp | Adjusts consistency |
| Vanilla extract | 1 tsp | Rounds out the fruit flavor |
| Pinch of salt | — | Cuts sweetness |
For the Black Vanilla Buttercream
| Ingredient | Amount | Why It’s There / Substitute |
|---|---|---|
| Unsalted butter, softened | ½ cup | Flavor and creaminess |
| Vegetable shortening | ½ cup | Stability; pure butter alone is harder to color deeply |
| Powdered sugar, sifted | 4 cups | Structure |
| Black gel food coloring | 1–2 tbsp | Gel, not liquid — liquid makes frosting runny |
| Vanilla extract | 1½ tsp | Flavor base |
| Heavy cream | 2–4 tbsp | Loose to spreadable consistency |
| Cocoa powder (optional) | 1 tbsp | Pre-darkens frosting, reduces gel needed |
For Kuromi Decorations
| Ingredient | Amount | Why It’s There / Substitute |
|---|---|---|
| White fondant | 200g | Face and skull details |
| Black fondant | 150g | Jester hat, ear accents |
| Purple fondant | 50g | Hat scallop trim |
| Pink gel food coloring | small amount | Eye details, rosy cheeks |
| Edible white luster dust | optional | Gives skull a slight sheen |
| Tylose powder | ½ tsp | Mixed into fondant to firm it up for details |
Step-by-Step Instructions
Phase 1: Bake the Vanilla Layers
- Preheat your oven to 350°F (175°C). Grease and line two 8-inch round cake pans with parchment. I use baking spray with flour — it saves a step.
- Whisk together flour, baking powder, and salt in a medium bowl. Set aside.
- In a stand mixer (or large bowl with a hand mixer), beat butter and oil together on medium for about 2 minutes until creamy. Add sugar and beat for another 3 minutes — it should look pale and fluffy, almost like thick whipped cream.
- Add eggs one at a time, beating for 30 seconds after each. Scrape down the bowl. Add vanilla and almond extracts.
- Stir sour cream into the milk. With the mixer on low, alternate adding the flour mixture and the milk mixture — start and end with flour, three additions of flour and two of milk. Mix just until combined. Overmixing = dense cake.
- Divide batter evenly between the prepared pans. Bake for 28–32 minutes, until a toothpick in the center comes out clean and the top springs back when gently pressed.
- Cool in the pans for 15 minutes, then turn out onto wire racks. Cool completely before frosting — at least 2 hours, or overnight wrapped in plastic.
Phase 2: Make the Strawberry Filling
- Beat softened butter on medium for 2 minutes until pale. Add sifted powdered sugar in two additions, beating on low first to avoid a sugar cloud.
- Add freeze-dried strawberry powder, vanilla, and salt. Beat on medium-high for 3 minutes until fluffy. Add cream one tablespoon at a time until the frosting holds soft peaks but isn’t stiff. It should spread easily.
- Taste it. It should be bright and fruity, not cloyingly sweet. Adjust with a tiny pinch more salt if needed.
Phase 3: Make the Black Buttercream
- This is where most kuromi cake projects go sideways: black frosting takes time and the right technique. Start by beating butter and shortening together for 3 minutes. Add sifted powdered sugar gradually.
- If using cocoa powder, add it now — it pre-darkens the base and means you’ll need less gel color. Beat until smooth.
- Add black gel food coloring, starting with 1 tablespoon. Beat on medium-high for 2 minutes. The color will deepen as you mix and as it sits. Let the frosting rest 10 minutes, then check — it’s almost always darker than you think. Add more gel only if it looks charcoal rather than true black.
- Add cream gradually until the frosting is smooth and spreadable but holds its shape when you run a spatula through it.
Phase 4: Assemble the Cake
- If your cake layers domed, use a serrated knife to level them off. (This is the mistake I skipped on my first attempt — uneven layers make a lopsided character cake look extra off.)
- Place one cake layer on your cake board or plate. Spread the strawberry filling to about ½ inch from the edge (it will press to the edges when you add the top layer).
- Place the second layer on top, cut side down. Press gently to set.
- Apply a thin crumb coat of black buttercream all over the cake. Refrigerate for 30 minutes — this is non-negotiable. The crumb coat seals loose crumbs so your final layer is clean.
- Apply the final coat of black buttercream using an offset spatula and bench scraper. Work in long, smooth strokes. Refrigerate again for 20 minutes before decorating.
Phase 5: Make Kuromi’s Face and Details
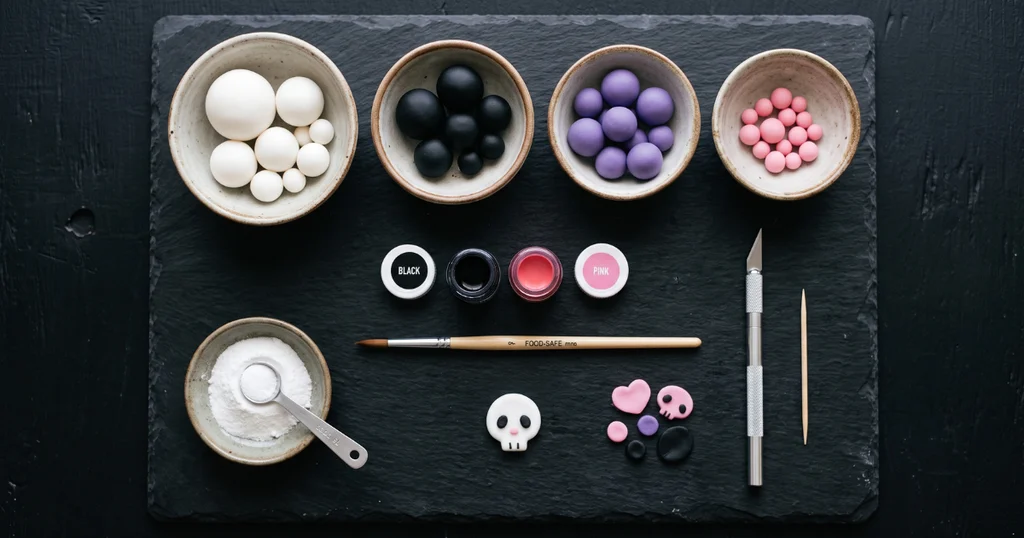
- Mix tylose powder into your white and black fondant — this helps it firm up so the details hold their shape.
- For Kuromi’s face: roll white fondant to about 3mm thick. Cut an oval roughly 3 inches tall and 2.5 inches wide. Place it centered on the front of the cake. Use a toothpick or ball tool to press in two oval eye sockets.
- For the purple scallop trim on the jester hat: roll a thin rope of purple fondant and shape it into a curved scalloped border. Press gently around the base of the hat.
- For the black jester hat: shape a cone from black fondant, flatten slightly, and position on top of the cake. Add a tiny white fondant skull at the tip of the hat — Kuromi’s signature detail.
- Use pink gel food coloring (dabbed lightly with a small brush) to add her rosy cheeks. For the eyes, paint or place small almond-shaped pieces of pink fondant inside the eye sockets.
- Add small white fondant fangs at the bottom of the face oval — they’re subtle but immediately recognizable.
Pro Tips and Common Mistakes
The black frosting always looks gray at first. Don’t panic, and don’t keep adding color. Make the frosting the day before and let it sit overnight — the color develops significantly in 12 hours.
Fondant dries out fast. Keep pieces you’re not actively working with inside a zip-lock bag with a tiny smear of shortening. I lost a whole batch of white fondant on my first attempt because I left it out while I was taking photos.
Chill between every major step. A cold cake is a stable cake. If your buttercream starts sliding, the cake is too warm. Put it back in the fridge for 20 minutes.
Don’t skip the crumb coat. I know it feels like an extra step. It is absolutely necessary for a clean black exterior — any cake crumbs showing through a black frosting are very visible.
Cocoa powder is your shortcut. Adding just 1 tablespoon to the black frosting pre-darkens the base so you need far less gel coloring. Less gel = better texture.
Variations and Substitutions
Chocolate sponge version: Swap ½ cup of flour for cocoa powder and add an extra ¼ cup of hot water to the batter. The darker crumb is more forgiving under black frosting.
Strawberry filling alternatives: Raspberry jam (thin it slightly with a teaspoon of water) works beautifully. A lemon curd filling adds a tartness that cuts the sweetness of the black buttercream.
Nut-free: Simply omit the almond extract. The cake is still flavorful with just vanilla.
Smaller cake: This batter makes two 8-inch layers. You can also bake in two 6-inch pans for a taller, more dramatic cake — increase bake time by about 5 minutes and check with a toothpick.
Sheet cake version: If the character decorating feels too ambitious right now, pour the batter into a 9×13 pan, frost it black, and pipe Kuromi’s face on top using a piping bag with white frosting.
Storage, Reheating, and Make-Ahead
Make-ahead: Bake the cake layers up to 3 days in advance. Wrap tightly in plastic wrap and refrigerate, or freeze for up to 6 weeks. The strawberry buttercream can be made 5 days ahead and stored in the fridge; re-whip before using. Black buttercream keeps in the fridge for up to 1 week — as a bonus, the color deepens during storage.
Assembled cake: Keeps covered in the fridge for up to 4 days. The fondant decorations can weep slightly in a very humid fridge — if that’s a concern in your kitchen, add the fondant pieces the day of serving.
Room temperature: If your kitchen is cool (below 70°F), the decorated cake can sit covered at room temperature for up to 24 hours.
Freezing assembled: I don’t recommend freezing after the fondant is applied — it can crack or bleed. Freeze the frosted (un-decorated) cake, then add fondant after thawing.
Serving from fridge: Take the cake out 30–45 minutes before serving. Cold buttercream is dense; room temperature buttercream is where the magic is.
Serving Suggestions
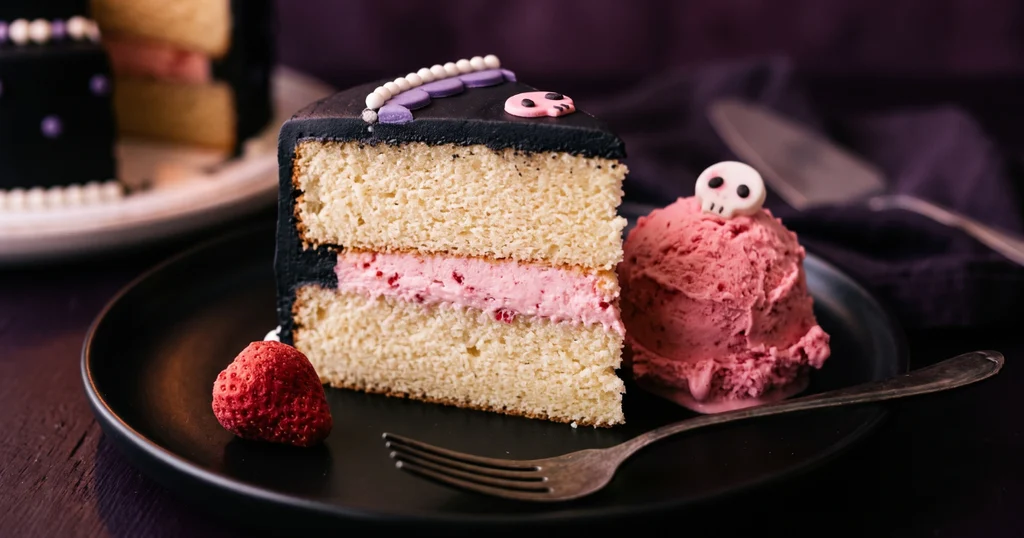
This kuromi cake is visually dramatic, so let it be the centerpiece. Serve it on a black or white cake board with a few small skull-themed sprinkles scattered around the base.
For a full Sanrio or Halloween-adjacent dessert table, pair it with easy no-bake cheesecake cups in purple and black, or a batch of simple vanilla cream sandwich cookies decorated to match.
A scoop of vanilla or strawberry ice cream alongside each slice is genuinely excellent — the cold ice cream against the soft cake and rich buttercream is a combination I didn’t expect to love as much as I do.
For a birthday party, cut the cake with a warm knife (run it under hot water, dry it, then slice) for the cleanest cuts through the fondant decorations.
Frequently Asked Questions
Can I make a kuromi cake without fondant?
Yes. You can pipe all of Kuromi’s facial features using buttercream bags fitted with small round tips. It takes more control than fondant, but it’s completely doable and the result tastes even better since fondant is mostly sugar.
How far in advance can I make a kuromi cake?
You can bake and freeze the layers up to 6 weeks ahead. The fully assembled and frosted cake (before fondant) keeps refrigerated for 4 days. I recommend doing the fondant decoration no more than 1–2 days before serving.
What food coloring works best for black buttercream?
Always use gel food coloring, not liquid. Liquid adds too much moisture and turns your buttercream soupy. I use Americolor Super Black gel — about 1–1.5 tablespoons for a rich true black. Starting with cocoa powder in the base also helps dramatically.
Why does my black frosting taste bitter?
Heavy use of black gel coloring can leave a slightly bitter or chemical aftertaste. The cocoa powder trick helps reduce how much gel you need. Some bakers also add a small amount of espresso powder to mask any off-notes. If you taste bitterness, add a pinch of extra salt and a teaspoon of vanilla.
What’s the difference between a character cake and a regular decorated cake?
A character cake — like this kuromi cake — aims to represent a specific face or figure with recognizable features. The decoration has to be accurate enough to be identifiable, which means the placement, proportions, and color matching matter more than with a generically decorated cake. It’s a higher-accuracy task, but the tools you need are the same.
Can I use store-bought fondant?
Absolutely. Satin Ice and Wilton both work well. Homemade marshmallow fondant is softer and easier to color, and honestly tastes better if you’re planning to eat the decorations.
How many people does this kuromi cake serve?
Two 8-inch layers, generously filled and frosted, will comfortably serve 12–16 people. For a child’s birthday with other food on the table, you can easily serve 16–18.
Conclusion
This kuromi cake took me from “I’ve never done fondant in my life” to “I’m actually kind of proud of this” in one long, coffee-fueled weekend. The vanilla-almond sponge is genuinely delicious, the strawberry filling is one I’ll keep using in other cakes, and the black buttercream — once you trust the process — comes together beautifully. Whether you’re making it for a Sanrio fan, a Halloween party, or just because you want a cake that’s a little bit spooky and a whole lot of fun, this recipe delivers. Take your time on the decoration, keep everything cold, and enjoy the process.
Written by Oussama Ij, home cook and food writer.