
The Best Homemade Beef Stew You’ll Ever Make
Table of Contents
The first time I made beef stew on my own, I pulled a pot of gray, watery disappointment off the stove and tried to serve it to my mother-in-law. She was gracious about it. I was mortified. The beef was rubbery, the broth tasted thin, and the potatoes had turned to mush. That was seven years ago, and I’ve made beef stew probably fifty times since — tweaking, testing, and fixing every mistake I made that night.
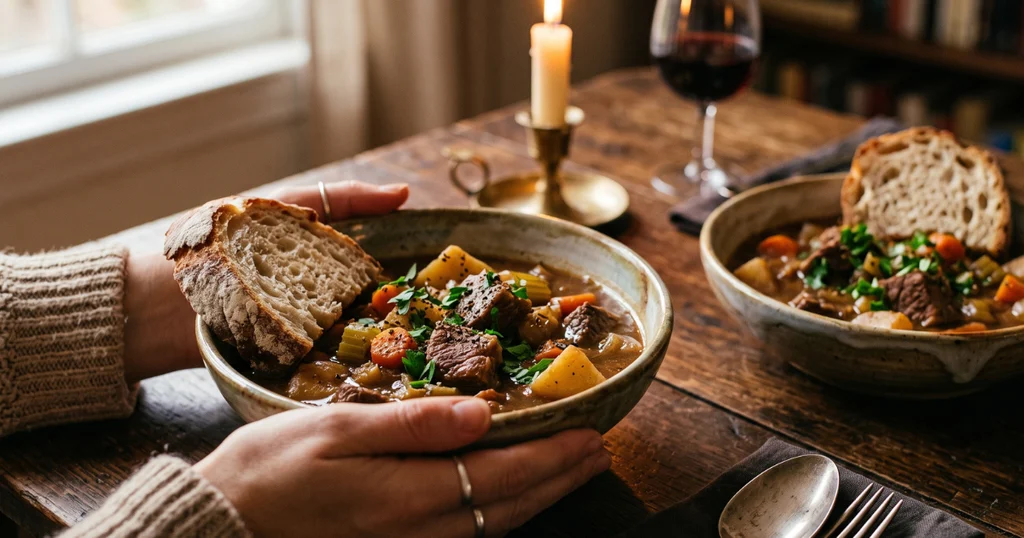
This recipe is the version I actually make now, the one my family requests by name every October when the weather drops. A proper beef stew should have fall-apart tender chunks of beef, a glossy, deeply savory gravy that coats the back of a spoon, and vegetables that hold their shape rather than dissolving into the broth. If yours has never done all three at once, this guide will show you exactly why — and exactly how to fix it.
Why This Beef Stew Recipe Actually Works
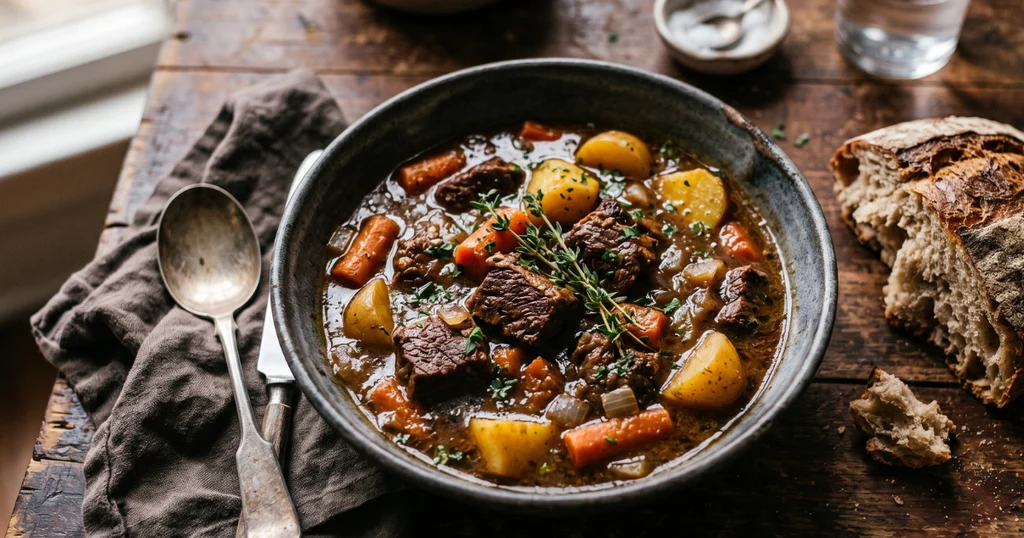
Most recipes skip the two steps that matter most: searing the beef properly and building flavor in the fat left behind. The first time I tested this recipe without searing, the stew tasted flat — like boiled meat in broth. With a proper sear, that stew tasted like something you’d order at a pub on a cold night.
The second thing that makes a real difference is using chuck roast instead of pre-packaged “stew meat.” Those pre-cut cubes are often from multiple muscle groups and cook unevenly. A two-pound chuck roast that you cube yourself gives you consistent pieces with the right fat marbling to stay moist during a long braise.
Finally, a small amount of tomato paste and Worcestershire sauce adds umami depth that makes the braising liquid taste like it’s been simmering for days, not hours. That layered flavor is what separates a memorable beef stew from a forgettable one.
Ingredients
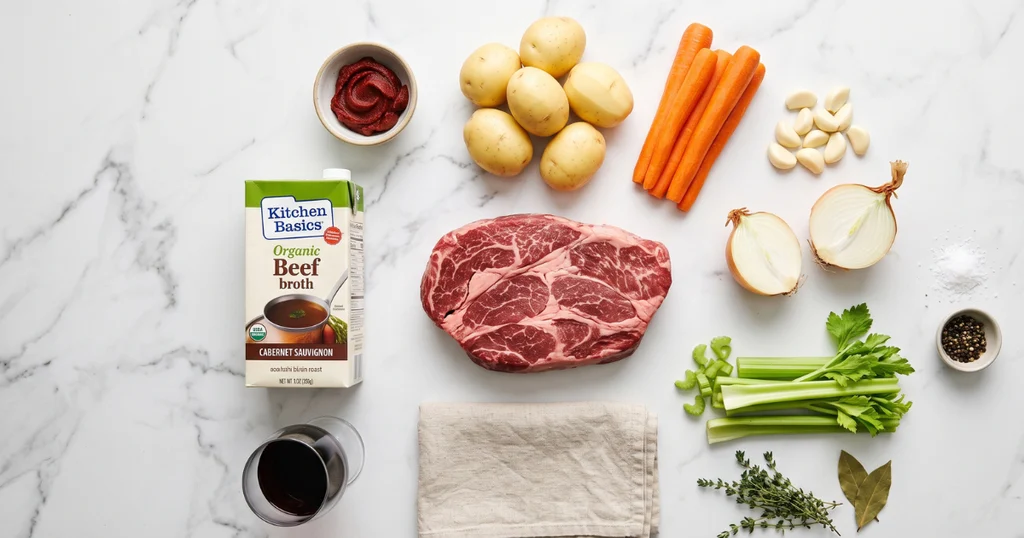
| Ingredient | Amount | Why It’s There / Substitute |
|---|---|---|
| Beef chuck roast | 2 lbs | High fat marbling = tender, juicy beef; sub: short rib meat |
| Olive oil | 2 tbsp | For searing; sub: vegetable or avocado oil |
| All-purpose flour | 3 tbsp | Coats beef and thickens the broth |
| Kosher salt | 1½ tsp | Seasons throughout; adjust to taste |
| Black pepper | 1 tsp | Background heat; freshly cracked preferred |
| Yellow onion | 1 large, diced | Sweetness and body in the base |
| Garlic cloves | 4, minced | Depth; sub: ½ tsp garlic powder |
| Tomato paste | 2 tbsp | Rich umami backbone |
| Worcestershire sauce | 1 tbsp | Savory, slightly tangy complexity |
| Dry red wine | 1 cup | Adds depth to the braise; sub: extra beef broth |
| Beef broth | 3 cups | The braising liquid base; low-sodium preferred |
| Carrots | 3 medium, cut into 1-inch pieces | Sweetness and color; hold shape well |
| Yukon Gold potatoes | 1 lb, cubed | Creamy texture, hold shape better than russets |
| Celery stalks | 2, sliced | Aromatic base; sub: fennel for a different note |
| Fresh thyme | 4 sprigs | Earthy, herbal note; sub: 1 tsp dried |
| Bay leaves | 2 | Background herbal depth; remove before serving |
| Fresh parsley | 2 tbsp, chopped | Bright finish; stir in at the end |
| Frozen peas (optional) | ½ cup | Color and freshness; add in the last 5 minutes |
Step-by-Step Instructions
Phase 1: Prep the Beef
1. Cut and dry the chuck roast.
Slice your chuck roast into 1½-inch cubes — slightly larger than you think you need, since they shrink during braising. Pat every piece completely dry with paper towels. This step sounds fussy but it’s critical: wet beef steams instead of sears, and you’ll never get that deep brown crust.
2. Season and flour the beef.
Toss the dried cubes with ½ teaspoon of salt, ½ teaspoon of pepper, and all 3 tablespoons of flour until every surface is lightly coated. Shake off any excess. The flour does double duty — it promotes browning and thickens the stew as it braises.
Phase 2: Sear and Build the Base
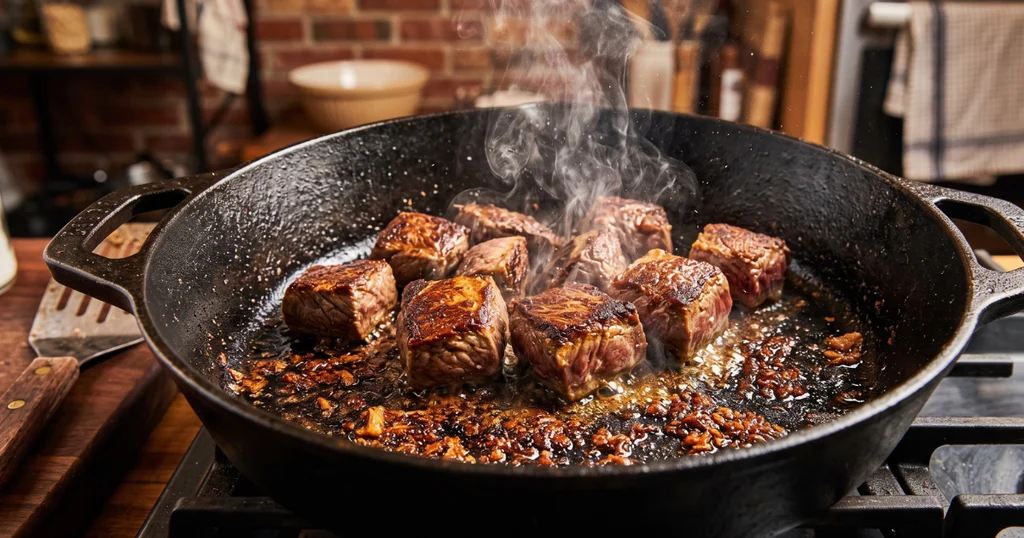
3. Heat your pot and sear the beef.
Heat a heavy Dutch oven (at least 5-quart) over medium-high heat. Add the olive oil and let it get shimmering hot before you add a single piece of beef. Working in two batches — never crowding the pan — sear the beef for 3–4 minutes per side until deeply browned on at least two faces. Remove to a plate and repeat with the second batch.
This is the step I rushed the first time, and it ruined the entire pot. You want a proper crust, not a gray surface. Don’t move the beef around — let it sit.
4. Sauté the aromatics.
Reduce the heat to medium. Add the diced onion to the same pot with all its browned bits, and cook for 3–4 minutes until softened and translucent. Add the minced garlic and cook for another 60 seconds until fragrant — you’ll smell it bloom.
5. Add tomato paste and deglaze.
Stir in the tomato paste and cook it for 2 minutes, stirring constantly, until it turns a shade darker and smells slightly caramelized. Pour in the red wine and scrape the bottom of the pot vigorously with a wooden spoon to lift all those browned bits. Those bits are flavor, and every last one belongs in your beef stew.
Phase 3: Braise the Stew
6. Add broth and return the beef.
Pour in the beef broth, then add the Worcestershire sauce, thyme sprigs, and bay leaves. Return all the seared beef (and any collected juices from the plate — that matters) to the pot. The liquid should just barely cover the meat. Bring to a gentle boil, then reduce to a low simmer.
7. Simmer low and slow.
Cover the pot and cook on the stovetop over low heat for 1 hour and 15 minutes. The liquid should be barely bubbling — not rolling. This is a common mistake: too high a heat makes the beef tough and stringy rather than tender.
8. Add the vegetables.
After 1 hour and 15 minutes, uncover the pot and add the carrots, potatoes, and celery. Stir gently to submerge them in the braising liquid. Cover again and continue simmering for another 30–35 minutes, until the potatoes yield easily when pierced with a fork and the carrots are tender but not falling apart.
Phase 4: Finish and Serve
9. Check and adjust the consistency.
Once the vegetables are done, remove the thyme sprigs and bay leaves. If your beef stew broth looks thin, mix 1 tablespoon of cornstarch with 2 tablespoons of cold water and stir it into the pot. Simmer uncovered for 5 more minutes — the gravy will thicken noticeably.
10. Stir in parsley and taste for seasoning.
Add the fresh parsley (and peas, if using) and stir through. Taste and adjust salt and pepper as needed. Ladle into bowls and serve immediately.
Pro Tips and Common Mistakes
Don’t skip patting the beef dry. Every time I’ve tested this in a hurry and skipped this step, the sear is poor and the stew tastes noticeably flatter. Moisture is the enemy of browning.
Cut your vegetables larger than you think. Anything smaller than 1 inch will dissolve into the broth during the final 30-minute simmer. I learned this the hard way when my carrots essentially disappeared into the gravy one Sunday afternoon.
Never boil your stew once the vegetables are in. A rolling boil at this stage will make the potatoes fall apart and leave you with a cloudy, starchy broth. Low and slow is the only way.
Use a Dutch oven, not a regular pot. The heavy base regulates heat and prevents scorching. I once used a thin-bottomed stockpot and burned the bottom of the stew without even realizing it until I tasted a slightly bitter note.
Red wine makes a difference. You don’t need expensive wine — I use whatever dry red I have open. But skipping it entirely leaves a noticeable gap in the depth of flavor. If you’re avoiding alcohol, swap it for an equal amount of extra broth plus a tablespoon of red wine vinegar.
Variations and Substitutions
Slow cooker beef stew. Complete steps 3–5 on the stovetop (the sear and deglaze are worth it even for slow cooker recipes), then transfer everything to your slow cooker. Add broth and vegetables, and cook on LOW for 7–8 hours or HIGH for 4–5 hours.
Instant Pot beef stew. Sear the beef using the Sauté function. Add all ingredients except the potatoes and carrots. Cook on HIGH pressure for 35 minutes, then quick-release. Add the vegetables and cook on HIGH pressure for another 6 minutes, then quick-release again.
Guinness beef stew. Swap the red wine for one 14.9-oz can of Guinness stout. The bitter, roasted flavor of the beer creates a darker, richer stew that pairs beautifully with crusty bread.
Root vegetable additions. Parsnips, turnips, or diced butternut squash all work beautifully in this stew. Add them at the same time as the potatoes.
Gluten-free version. Replace the all-purpose flour with a gluten-free 1:1 flour blend or use cornstarch (1½ tablespoons) mixed directly into the broth before adding it. The end result is nearly identical.
If you enjoy hearty, slow-cooked comfort food, you might also love the meat recipes for more weeknight inspiration.
Storage, Reheating, and Make-Ahead Instructions
Refrigerator storage: Cool the stew completely before transferring to an airtight container. It keeps well in the fridge for up to 4 days. The flavor actually improves significantly on day two, as the braising liquid has time to absorb into the beef and vegetables overnight.
Freezer storage: Beef stew freezes beautifully for up to 3 months. Freeze in portion-sized containers so you can thaw exactly what you need. Note that potatoes can sometimes turn slightly grainy after freezing — if you plan to freeze the stew, consider leaving potatoes out and cooking them fresh when you reheat.
Reheating: Reheat gently on the stovetop over medium-low heat, stirring occasionally, for about 10–12 minutes. Add a splash of beef broth if the stew has thickened too much during storage. Avoid microwaving the whole batch — it heats unevenly and the beef can overcook.
Make-ahead tip: This beef stew is an ideal make-ahead meal. You can prepare the entire pot up to 2 days in advance and refrigerate it. The flavors will be noticeably deeper when you reheat it for serving — something about that rest time turns a good stew into a great one.
Serving Suggestions
A bowl of rich beef stew needs something to catch the gravy. Crusty sourdough bread or a warm dinner roll is the classic choice, and honestly, you can’t go wrong. I grew up eating it over white rice, which is underrated and absolutely delicious.
Creamy mashed potatoes are another favorite — though you’re essentially doubling up on potato, which I have no complaints about. Egg noodles work beautifully too, giving the stew a slightly more rustic, European feel.
For a lighter contrast, serve alongside a simple green salad dressed with lemon and olive oil — the acidity cuts through the richness of the gravy nicely.
If you’re serving this for guests, a slice of homemade cornbread on the side feels special without adding extra work. You can also finish individual bowls with an extra grind of black pepper and a sprig of fresh thyme for presentation.
Frequently Asked Questions
Can I use pre-packaged stew meat instead of chuck roast?
You can, but I’d encourage you to buy a chuck roast and cut it yourself whenever possible. Pre-packaged stew meat often comes from multiple cuts and contains pieces of varying sizes, which means some will be tender while others are still tough at the same cooking time. Cutting your own ensures consistency — and at most grocery stores, a chuck roast is actually the same price per pound.
How long does beef stew take to cook on the stovetop?
From start to finish, expect about 2 hours total — roughly 20 minutes of active prep and searing, 1 hour and 15 minutes of simmering before the vegetables go in, then another 30–35 minutes once the vegetables are added. The beef needs that full low-and-slow time to break down the connective tissue and become genuinely tender.
What’s the difference between beef stew and beef soup?
The main difference is the ratio of liquid to solids and the consistency of the broth. A beef stew has a thick, gravy-like broth and a higher proportion of chunky meat and vegetables. Beef soup has a thinner, more watery broth and the ingredients are usually smaller. If you accidentally make your stew too thin, stir in a cornstarch slurry (1 tablespoon cornstarch dissolved in 2 tablespoons cold water) and simmer for 5 minutes to correct it.
Can I make beef stew in the oven instead of on the stovetop?
Yes — and honestly, oven braising gives you incredibly even, gentle heat. After completing the sear and deglazing steps on the stovetop, cover your Dutch oven and transfer it to a 325°F (160°C) oven. Cook for 1 hour and 30 minutes, then add the vegetables and return to the oven for another 35–40 minutes. The beef becomes especially silky using this method.
Why is my beef stew tough even after a long cooking time?
Two likely causes: either the heat was too high (a hard boil tightens the muscle fibers instead of relaxing them), or you didn’t cook it long enough. Beef chuck needs sustained low heat — around 200–210°F in the pot — to break down the collagen into gelatin, which is what gives the broth that rich, silky texture. If your beef is still tough after 1 hour and 15 minutes, give it another 20–30 minutes before adding the vegetables. Collagen breakdown in beef requires sustained low heat — patience really does pay off here.
Can I add wine to beef stew if cooking for children?
The alcohol in the wine cooks off almost entirely during the long simmer — most of the ethanol evaporates within the first 30 minutes of cooking. If you’re still concerned, substitute the wine with extra beef broth plus a tablespoon of red wine vinegar and a teaspoon of grape juice for a similar flavor profile without any alcohol content.
Conclusion
A truly great beef stew is one of those recipes that rewards patience — not complicated technique. Dry your beef, sear it properly, deglaze the pot, and let time do the rest. The version you have now, after reading through all of this, is the one I wish I’d had on that embarrassing first attempt seven years ago.
Make it once on a Sunday, and I’d be surprised if it isn’t on your regular rotation by winter. If you try it, I’d love to know how it went in the comments below.
For more cozy weeknight dinners, browse our hearty soup and stew recipes or check out our collection of easy meat dinner recipes for more ideas.
Written by Oussama Ij, home cook and food writer.