
The Ultimate Nestle Chocolate Chip Cookie Recipe You’ll Love
Table of Contents
The Ultimate Nestle Chocolate Chip Cookie Recipe You’ll Love (And Make Again and Again)
There’s a moment — you probably know it — when the kitchen fills with that warm, buttery, chocolatey smell and everything else in the world just melts away. Maybe it takes you back to your mom’s kitchen on a rainy afternoon, or maybe it’s a feeling you’re chasing for the first time. Either way, the Nestle chocolate chip cookie recipe has been creating exactly those moments since 1939, and it shows no signs of slowing down.
This isn’t just any cookie recipe. This is the original Toll House formula — the one Ruth Wakefield built from scratch at her inn in Massachusetts, the one Nestle printed on the back of their chocolate chip bags for over eight decades. If you’ve been searching for a foolproof, crowd-pleasing, genuinely delicious batch of cookies, your search ends right here.
Why the Nestle Chocolate Chip Cookie Recipe Has Never Gone Out of Style
Before you preheat your oven, it’s worth understanding why this particular recipe has outlasted food trends, diet fads, and decades of competition from thousands of other cookie formulas.
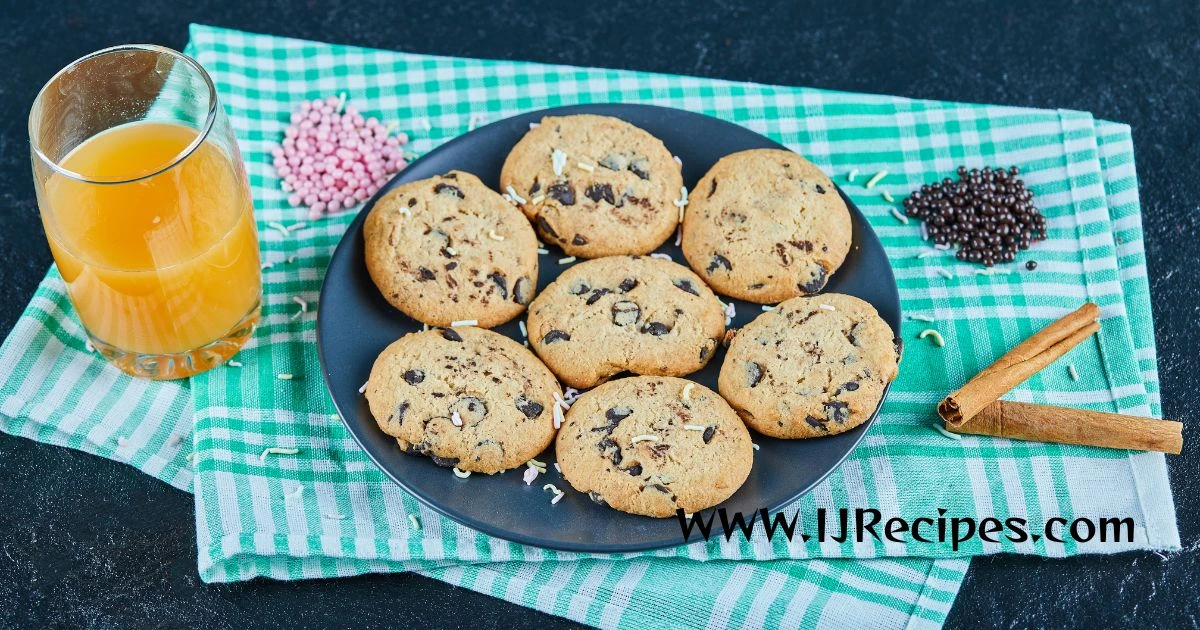
The answer is balance. The Nestle chocolate chip cookie recipe hits every note at once — crispy golden edges, a soft and chewy center, deep caramel sweetness from brown sugar, and pockets of rich chocolate in every single bite. It uses ingredients you already have in your pantry, requires no special equipment, and delivers consistent results whether you’re a first-time baker or someone who’s made this recipe a hundred times.
Ruth Wakefield sold her recipe to Nestle in 1939 in exchange for a lifetime supply of chocolate — arguably one of the best deals in culinary history. Since then, more than 100 million pounds of Nestle Toll House chocolate chips are sold every single year in the United States alone. That number doesn’t lie.
Everything You’ll Need: Ingredients at a Glance
Getting your ingredients right before you start is half the battle. Here’s exactly what you need for a standard batch that makes approximately 60 cookies.
| Ingredient | Amount | Notes |
|---|---|---|
| All-purpose flour | 2 ¼ cups | Spooned and leveled — never packed |
| Baking soda | 1 tsp | Check the expiration date |
| Salt | 1 tsp | Balances all the sweetness |
| Butter (softened) | 1 cup (2 sticks) | Room temperature is non-negotiable |
| Granulated sugar | ¾ cup | Gives the edges their crispiness |
| Packed brown sugar | ¾ cup | The secret behind chewy centers |
| Large eggs | 2 | Also at room temperature |
| Pure vanilla extract | 1 tsp | Skip the imitation stuff |
| Nestle Toll House semi-sweet chocolate chips | 2 cups (12 oz bag) | The star of the show |
If you want to take things further, toss in ½ cup of chopped walnuts for a classic twist, or swap in dairy-free butter and chocolate chips for a plant-based version that works just as beautifully.
Step-by-Step Instructions: How to Nail This Recipe Every Time
Step 1 — Set Yourself Up for Success
Pull your butter and eggs from the fridge at least 30 to 60 minutes before you start. Cold butter simply won’t cream properly, and cold eggs can cause the batter to separate. Preheat your oven to 375°F (190°C) and line your baking sheets with parchment paper or a silicone mat.
Step 2 — Whisk Your Dry Ingredients
In a medium bowl, combine your flour, baking soda, and salt. Give it a good whisk so everything is evenly distributed. Setting this aside separately means you won’t end up with pockets of baking soda or uneven seasoning in your final dough.
Step 3 — Cream the Butter and Sugars
This is where the magic starts. In a large bowl, beat your softened butter with both sugars for a full 3 to 4 minutes. You’re looking for a pale, fluffy mixture that has noticeably increased in volume. Don’t rush this step — proper creaming is what separates flat, sad cookies from ones with structure, chew, and character.
Add your eggs one at a time, beating well after each addition, then mix in the vanilla extract.
Step 4 — Bring It All Together
Gradually add your flour mixture to the butter mixture, mixing on low speed until just combined. The moment you don’t see dry flour streaks anymore, stop mixing. Overworking the dough develops gluten, which turns your cookies tough and dense rather than tender.
Fold in your Nestle chocolate chips using a rubber spatula or wooden spoon, making sure they’re spread evenly throughout the dough.
Step 5 — Scoop, Space, and Bake
Drop rounded tablespoons of dough onto your prepared baking sheets, keeping them about 2 inches apart to give each cookie room to spread. Bake for 9 to 11 minutes, pulling them out when the edges look golden but the centers still appear slightly underdone. That soft center will firm up perfectly as the cookies cool on the pan.
Let them rest on the baking sheet for 2 minutes, then transfer to a wire rack. Try to wait at least 5 minutes before eating — if you can manage it.
Pro Tips That Separate Good Cookies From Great Ones
You could follow the recipe exactly and get perfectly fine cookies. Or you could follow these tips and get cookies that people will genuinely ask you about.
Chill your dough. If you have the patience, cover your dough and refrigerate it for 24 to 72 hours before baking. The wait develops a richer, more complex flavor and produces thicker cookies with a noticeably better chew. It’s one of the simplest improvements you can make.
Try browning the butter. Melt your butter in a saucepan over medium heat until it turns golden and smells nutty, then let it solidify back to room temperature. This adds a deep, toffee-like dimension to your cookies that the standard recipe simply can’t match.
Slightly underbake on purpose. This is the single most important trick for chewy cookies. Pull your tray from the oven when the centers look soft and the edges are just barely golden. The leftover heat from the pan will complete the cooking process.
Use an oven thermometer. Most home ovens run 10 to 25 degrees hotter or cooler than the dial suggests. A cheap oven thermometer takes the guesswork out completely and makes your results far more consistent.
Common Mistakes You’ll Want to Avoid
Even with a recipe this reliable, a few missteps can throw everything off. Here’s what to watch out for:
- Melted instead of softened butter results in cookies that spread into thin, greasy discs
- Packing the flour adds too much of it, leaving you with dry, crumbly cookies that crumble apart
- Skipping the creaming time gives you dense, flat cookies without proper lift
- Overmixing after adding flour toughens the dough through gluten development
- Baking on a hot pan causes the cookies to spread too quickly before the structure can set
- Not cooling on a rack traps steam underneath and softens the bottoms unevenly
Avoiding these six mistakes alone will put your cookies in an entirely different league.
How to Store Your Cookies (And Your Dough)
Once you’ve baked your perfect batch, here’s how to keep them that way.
| Storage Method | How Long | Best Practice |
|---|---|---|
| Room temperature (airtight container) | Up to 1 week | Add a slice of white bread to keep cookies soft |
| Refrigerator | Up to 2 weeks | Bring back to room temp before serving |
| Freezer (baked cookies) | Up to 3 months | Freeze in a single layer first, then bag |
| Freezer (raw dough balls) | Up to 3 months | Bake straight from frozen, add 2–3 minutes |
Freezing raw dough is genuinely one of the best things you can do for yourself. Future you will be very grateful when a cookie craving hits at 9 PM on a Tuesday.
FAQ: Your Nestle Chocolate Chip Cookie Recipe Questions Answered
Why are my Nestle chocolate chip cookies coming out flat? Flat cookies usually come down to butter that was too warm or melted, expired baking soda, or too little flour. Double-check that your butter is softened — not liquid — and that your leavening agent is still active.
Can I refrigerate the Nestle chocolate chip cookie recipe dough overnight? Not only can you, but you absolutely should. Chilling for 24 to 72 hours deepens the flavor significantly and gives you thicker, chewier results. Cover the dough securely to prevent it from drying out.
How do I make this recipe chewier? Use more brown sugar relative to white sugar, add one extra egg yolk (in addition to the two whole eggs), chill the dough before baking, and pull the cookies from Remove them from the oven while the center still appears slightly underbaked.
Can I freeze the cookie dough? Yes — scoop it into balls, freeze them on a parchment-lined sheet until solid, then transfer to a freezer bag. Bake from frozen at 375°F, adding two to three minutes to the standard bake time.
What makes the Nestle Toll House recipe different from other chocolate chip cookie recipes? It comes down to the ratio — the balance of both sugars, the specific amount of flour, and the use of two full cups of chocolate chips. That formula has been refined over 80 years and produces a result that genuinely holds up against any modern variation.
Conclusion: Your Best Batch of Cookies Starts Right Now
The Nestle chocolate chip cookie recipe has earned its place in kitchens across generations — not through marketing or nostalgia alone, but because it flat-out delivers. Follow the steps, apply the pro tips, avoid the common mistakes, and you’ll have a batch of cookies that could honestly rival anything from a high-end bakery.
So go ahead — preheat that oven, pull out your Toll House chips, and make something that fills your kitchen with the kind of smell that stops people in their tracks.
Bake a batch this week and share it with someone who could use a little sweetness in their day. Then come back and tell us how it went — drop your tips, your variations, and your results in the comments below. We’d love to hear what your perfect cookie looks like.