
How to Cook Chicken to Shred Perfectly Every Time
Table of Contents
There’s nothing quite like the disappointment of standing over a cutting board, fork in hand, only to discover your chicken has turned into a stringy, rubbery mess. You’ve invested time, effort, and ingredients, only to end up with disappointing results that make your dinner feel mediocre at best. Whether you’re preparing meals for the entire week or cooking for a special family gathering, mastering the technique of cooking chicken to shred can genuinely transform your kitchen experience and elevate your culinary confidence.
Why Learning How to Cook Chicken to Shred Matters
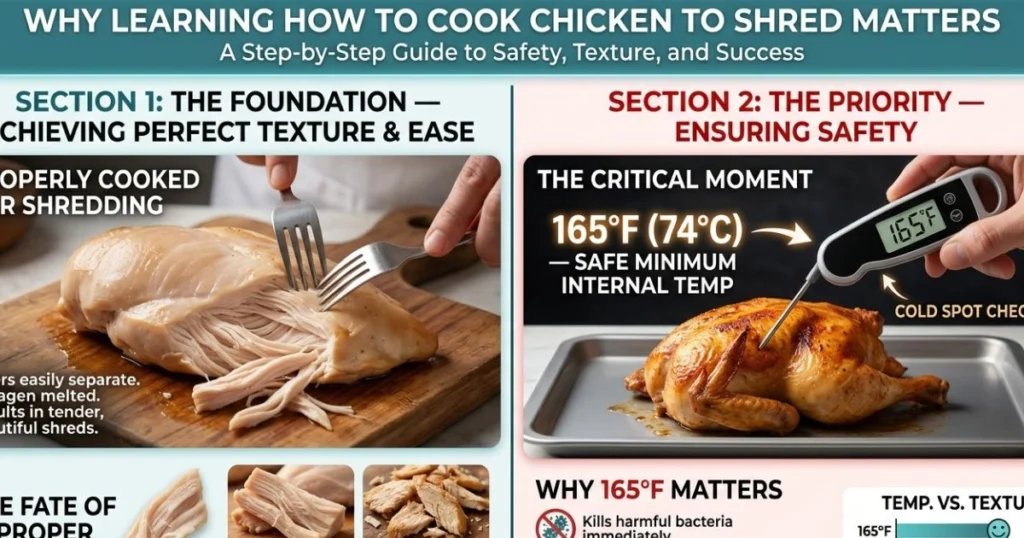
Before we dive into the methods, understand why this skill deserves your attention. When you learn how to cook chicken to shred correctly, you unlock countless possibilities. Your tacos become restaurant-quality, your salads gain substance and appeal, your soups transform into comfort in a bowl, and your meal-prep sessions become genuinely efficient rather than frustrating exercises in futility.
The difference between mediocre and magnificent shredded chicken comes down to understanding moisture, temperature, and timing. Many home cooks inadvertently sabotage their chicken by using techniques that leave the meat parched and tough. You don’t need fancy equipment or culinary training to change this pattern. You simply need the right approach.
The Instant Pot Method: Your Fastest Path to Perfectly Shredded Chicken
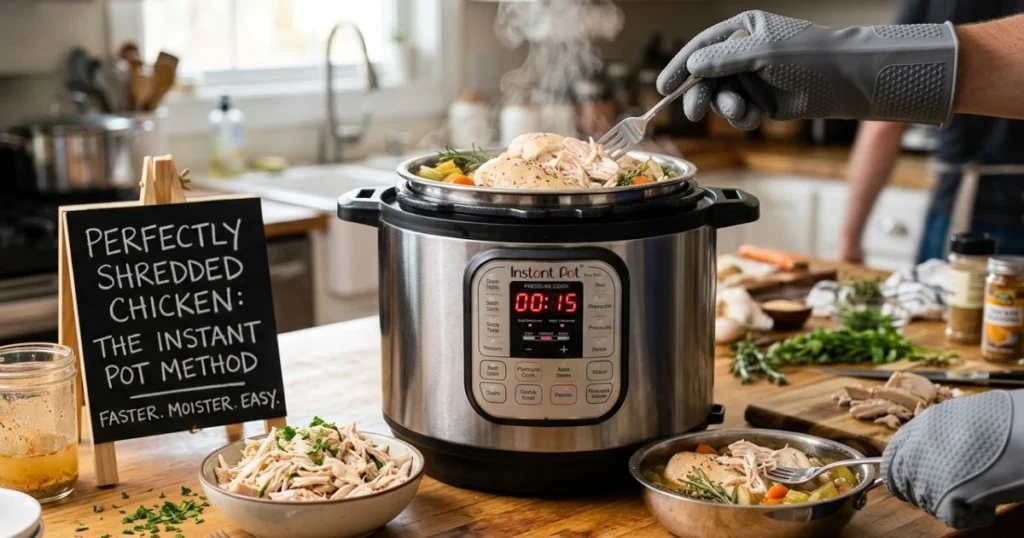
Your time is precious, which is why the Instant Pot method deserves your consideration. This approach requires just fifteen minutes from start to finish, making it ideal for hectic weeknights or when you’ve forgotten to plan ahead.
Here’s how you’ll execute this technique: Begin by adding one cup of chicken broth to your Instant Pot. Position the metal trivet inside, then arrange your chicken breasts on top. Don’t overcrowd the pot—your chicken needs room to cook evenly. Add minced garlic, fresh herbs, and bay leaves if you want to build flavor complexity. Seal the lid and set your Instant Pot to high pressure for eight minutes.
When the timer sounds, resist the urge to immediately release pressure. Instead, allow ten minutes of natural pressure release. This gradual process keeps your meat incredibly moist and tender. Only then should you quick-release any remaining pressure. Transfer your chicken to a cutting board and verify the internal temperature has reached 165°F with your instant-read thermometer.
The beauty of this method is its fail-safe simplicity. Your chicken won’t dry out because it’s surrounded by steam and broth the entire time. The moisture gets locked in, creating that fork-tender texture that makes shredding effortless.
The Slow Cooker Approach: Set It and Forget About It
Perhaps you prefer the hands-off approach that lets your kitchen equipment do the heavy lifting. Your slow cooker is genuinely your best friend in this scenario. This method requires patience, but the payoff—incredibly moist, fall-apart-easily chicken—makes every minute worthwhile.
Pour two cups of chicken broth into your slow cooker’s base. Add your chicken breasts along with aromatics: sliced onion, smashed garlic cloves, and a small handful of fresh thyme or rosemary. Cover and set to low heat for somewhere between four and eight hours, depending on your chicken’s thickness.
The extended, gentle heat breaks down connective tissues gradually, resulting in meat that’s impossibly tender. Unlike faster methods, your slow cooker forgives timing mistakes. If you’re running an hour behind schedule, no problem—your chicken will remain beautifully moist rather than drying out.
Boiling Method: The Traditional Approach That Still Works Brilliantly
Don’t dismiss boiling as old-fashioned. Your grandmother understood something important: simmering chicken in broth creates moist, flavorful meat that practically shreds itself.
Fill your pot with enough chicken broth or water to completely cover your chicken breasts by about an inch. Bring the liquid to a rolling boil, then immediately reduce the heat to maintain a gentle simmer. This distinction matters tremendously. A vigorous, rolling boil actually toughens your chicken. A gentle simmer keeps it tender.
Maintain this simmer for twelve to fifteen minutes, depending on your chicken’s size. Your meat should reach 165°F internally. Remove it carefully with tongs and let it cool for a few minutes—just long enough that you can comfortably handle it.
The reserved cooking liquid becomes liquid gold. This broth is packed with all the rich flavors released from your chicken. Save it. You’ll add it back to your shredded chicken if the meat seems at all dry, restoring moisture and deepening flavor simultaneously.
Critical Mistakes That Undermine Your Results
Your approach to certain details determines whether you end up with kitchen success or culinary disappointment. Understanding common pitfalls helps you sidestep them entirely.
Overcooking represents your biggest threat. When you leave chicken on heat too long, the proteins tighten up and squeeze out moisture. Your meat becomes dry and stringy—impossible to shred nicely. Always use a thermometer rather than guessing. Remove your chicken at exactly 165°F. Don’t cook it to 170°F or beyond, even though technically it’s still safe.
Insufficient cooking liquid is your second enemy. Your chicken needs moisture surrounding it during the cooking process. Skimping on broth means your meat has nothing to draw moisture from. Always use adequate liquid for your chosen method.
Uneven chicken sizing causes uneven cooking. If you toss a thick breast alongside a thin one, the thinner piece becomes overdone long before the thick piece finishes cooking. Take a moment to pound your breasts to uniform thickness before you start cooking. This small step creates dramatically better results.
Pro Techniques That Elevate Your Game
Once you’ve mastered the basics, these advanced strategies help you create restaurant-quality results consistently.
Season your cooking liquid generously. Rather than adding salt after cooking, incorporate it into your broth beforehand. The chicken absorbs seasoning gradually throughout cooking, creating evenly flavored meat rather than surface-level taste.
Reserve your cooking broth without fail. This liquid is precious. It carries every bit of flavor your chicken released. If your shredded chicken seems the slightest bit dry, add a few tablespoons of this broth back in. Your meat transforms into perfectly moist perfection.
Shred while your chicken is still warm. Once your meat cools completely, it becomes harder to shred and more prone to breaking apart unevenly. Wait just long enough to handle it safely—maybe two or three minutes—then begin shredding. You’ll find the process infinitely easier.
Experiment with flavor infusions. Try adding apple juice to your slow cooker along with the broth. Use vegetable-based cooking liquid instead of chicken for lighter flavor. Add a splash of fresh lemon juice to enhance the brightness. Each variation produces subtly different but equally delicious results.
Storage Solutions That Preserve Your Work
You’ve invested effort into cooking perfect chicken—protect that investment with smart storage practices.
Your shredded chicken keeps beautifully in the refrigerator for three to four days when stored in an airtight container. Keep it slightly moist by storing it with a few tablespoons of your reserved cooking broth. This prevents it from drying out as it sits.
For longer storage, freezing is your answer. Place your shredded chicken in freezer bags, remove as much air as possible, and freeze flat for easy storage. Your chicken maintains quality for two to three months this way. When you’re ready to use it, simply thaw it in the refrigerator overnight, and you’re back to having fresh-tasting chicken ready for any recipe.
Alternatively, freeze your chicken submerged in its cooking broth. This method preserves moisture beautifully and eliminates the thawing step—you can add it directly to soups and braises straight from the freezer.
Transform Your Cooking Into Your Strength

Learning how to cook chicken to shred perfectly isn’t complicated, but it does require attention to specific details. You now understand why temperature matters, why moisture is non-negotiable, and why timing affects your final result. These insights transform you from someone who struggles with disappointing chicken into someone who consistently produces tender, juicy, perfectly shredded meat.
Start with whichever method appeals to your lifestyle. If speed matters most, begin with your Instant Pot. If convenience is paramount, embrace your slow cooker. If you appreciate simplicity, stick with traditional boiling. There’s no wrong choice—only the method that fits your routine best.
The techniques outlined here work reliably. You won’t encounter mysterious failures or unexplained dry chicken if you follow these guidelines. Your next shredded chicken creation will be noticeably better than your previous attempts, and each subsequent time you’ll gain more confidence and skill.
Ready to Master This Essential Cooking Skill?
Your kitchen success starts now. Pick one of these methods this week and commit to trying it. Notice how the chicken responds to your technique. Observe the moisture levels, the ease of shredding, the flavor depth. Then try a different method next week. Within just a few cooking sessions, you’ll discover your preferred technique and understand why it works so beautifully.
Share your results in the comments below. Did you discover a method you love? Have you found creative ways to use your perfectly shredded chicken? Your experiences help other readers navigate their own cooking journeys. Additionally, bookmark this guide for future reference—you’ll return to it again and again as you perfect your technique and explore new recipes that showcase your newly acquired skill.
The only thing standing between you and consistently perfect shredded chicken is your willingness to try. Start today, and transform your weeknight dinners and meal-prep sessions forever.