

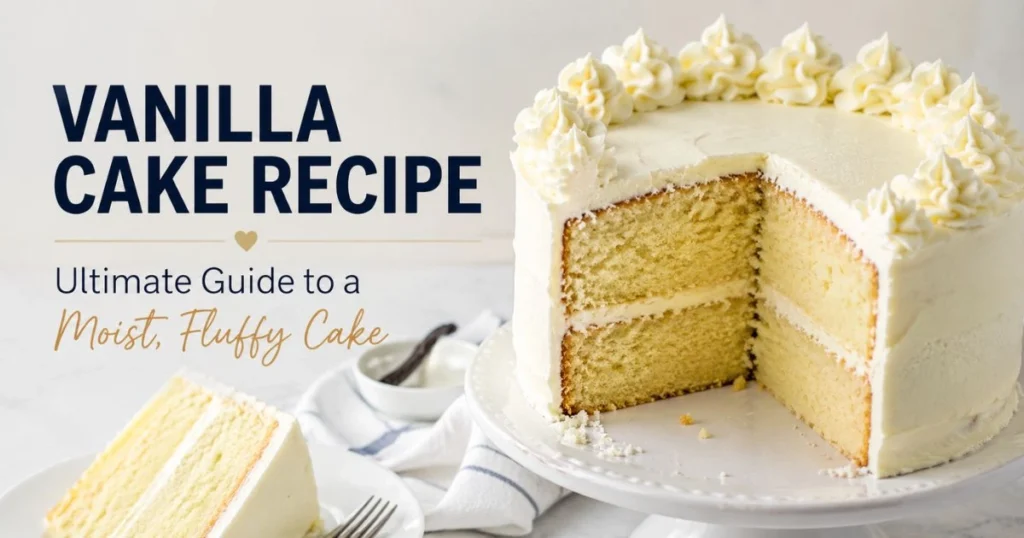
Vanilla Cake Recipe – Ultimate Guide to a Moist, Fluffy Cake
Table of Contents
Close your eyes for a second and think back to a birthday that actually mattered. Maybe it was yours, maybe it was someone you love. There was likely a cake — soft, golden, smelling of warm vanilla — sitting in the center of a table surrounded by people who were happy to be there. That cake wasn’t just dessert. It was the moment.
The truth is, vanilla cake has a reputation problem. People call it “basic” or “boring,” usually because they’ve only ever tasted the dry, flavorless versions that come stacked in plastic boxes at the grocery store. But a real vanilla cake recipe — one built with the right ingredients, the right technique, and just a little bit of patience — is anything but boring. It’s the kind of cake that makes people go quiet after the first bite.
This guide is for you whether you’re baking your very first cake or your fiftieth. You’ll learn exactly what ingredients to use and why, how to execute each step with confidence, and how to avoid the most common mistakes that lead to dense, dry results. By the time you finish reading, you’ll have everything you need to bake the moistest, fluffiest vanilla cake of your life — and the confidence to do it again and again.
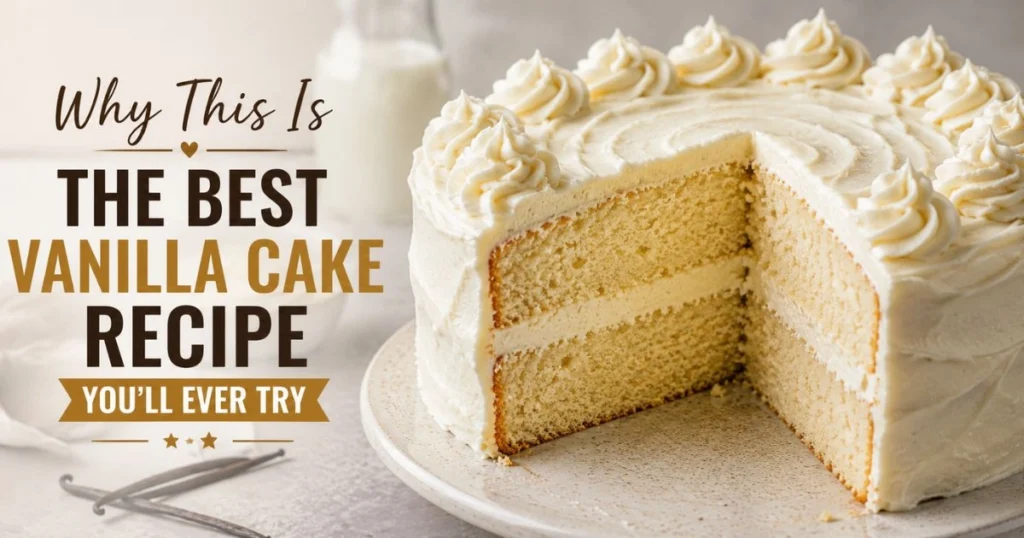
Why This Is the Best Vanilla Cake Recipe You’ll Ever Try
What Makes a Vanilla Cake Truly Special?
Not all vanilla cakes are created equal. The secret to a vanilla cake that everyone remembers lies in a few essential factors: high-quality vanilla, the right balance of fat and flour, and a mixing method that creates the perfect texture.
Real vanilla extract — not the imitation stuff — delivers a depth of flavor that simply cannot be replicated. It has floral, almost woody undertones that unfold gradually as you eat, rather than the sharp, one-note sweetness of artificial vanilla flavoring. If you’ve been using imitation extract all along, switching to pure vanilla will change everything.
Beyond flavor, the texture of a great vanilla cake is what sets it apart. It should be:
- Moist — not wet or gummy, but soft and tender all the way through
- Fluffy — a light, open crumb that springs back when you press it gently
- Flavorful — rich with butter and vanilla, not bland or floury
Achieving all three at once is the real goal of this guide — and it’s absolutely within your reach.
Ingredients for the Perfect Vanilla Cake Recipe
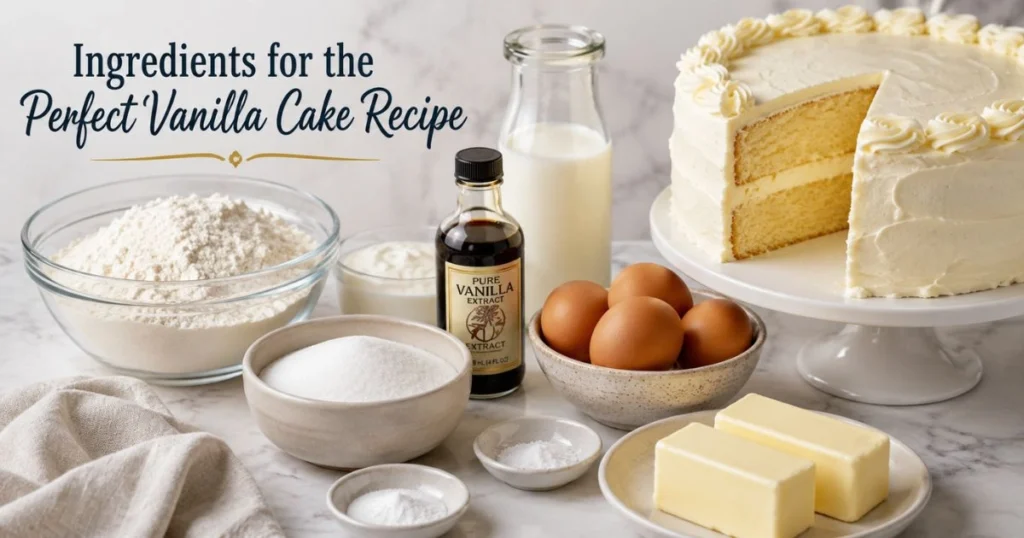
Getting your ingredients right is the single most important step before you even turn on your oven. Here’s everything you need:
Complete Ingredients Table
| Ingredient | Quantity | Notes |
|---|---|---|
| All-purpose flour | 2 ½ cups | Sifted for lighter texture |
| Granulated sugar | 1 ¾ cups | Fine sugar dissolves better |
| Unsalted butter | 1 cup (2 sticks) | Room temperature |
| Large eggs | 4 | Room temperature |
| Whole milk | 1 cup | Warm, not cold |
| Sour cream | ½ cup | Secret to extra moisture |
| Pure vanilla extract | 2 tsp | High-quality brand recommended |
| Baking powder | 2 ½ tsp | Fresh for best rise |
| Baking soda | ½ tsp | Balances acidity |
| Salt | ½ tsp | Enhances overall flavor |
| Vegetable oil | 2 tbsp | Adds softness |
Why Each Ingredient Matters
Butter and oil together — using both gives you the rich flavor of butter combined with the lasting moisture that oil provides. Butter alone can produce a cake that dries out quickly after a day; the oil keeps it soft longer.
Sour cream — this is the ingredient that separates an average vanilla cake from a genuinely outstanding one. It adds fat, moisture, and a very subtle tang that balances the sweetness without being detectable. If you’ve never baked with sour cream before, prepare to be converted.
Room temperature ingredients — cold butter won’t cream properly, cold eggs can cause the batter to curdle, and cold milk will tighten the fat and ruin your texture. Remove all ingredients from the refrigerator at least 45 minutes before you begin.
Ingredient Substitutions Table
| Original Ingredient | Substitute | Effect on Cake |
|---|---|---|
| Whole milk | Buttermilk | Tangier, extra tender crumb |
| Sour cream | Greek yogurt | Similar moisture, slightly lighter |
| Butter | Coconut oil | Subtle coconut note |
| All-purpose flour | Cake flour | Even softer, more delicate crumb |
| Eggs | Flax eggs (vegan) | Denser texture, vegan-friendly |
Equipment You Need Before You Start
You don’t need a professional kitchen to bake a great cake, but having the right tools makes the process significantly smoother.
Essential Baking Tools
- Two 9-inch round cake pans for perfectly even cake layers
- Stand mixer or hand mixer — creaming by hand is possible but exhausting
- Sifter or fine mesh strainer — removes lumps and aerates flour
- Rubber spatula — ideal for gently folding ingredients and scraping the bowl clean.
- Cooling rack — airflow underneath prevents soggy bottoms
- Parchment paper — guarantees your cake releases cleanly
- A toothpick or cake tester is the most dependable way to check for doneness.
Optional But Helpful
- A kitchen scale for precise flour measurements
- Cake strips that wrap around your pans to promote even baking
- An offset spatula for applying frosting smoothly
- A rotating cake turntable for decorating
Step-by-Step Vanilla Cake Recipe
Follow these steps carefully. Each one exists for a reason, and skipping or rushing any of them is usually where problems begin.
Step 1 — Prep Your Pans and Oven
Preheat your oven to 350°F (175°C). Grease your cake pans with butter or non-stick spray, dust lightly with flour, and then line the bottoms with circles of parchment paper. This triple-layer of preparation ensures your cakes will release cleanly every single time.
Place your oven rack in the center position. If you’re baking both layers at once, make sure there’s enough space between them for heat to circulate.
Step 2 — Mix the Dry Ingredients
In a medium bowl, sift together your flour, baking powder, baking soda, and salt. Don’t skip the sifting — it breaks up any clumps, aerates the flour, and ensures your leavening agents are evenly distributed throughout the batter. Set this bowl aside.
Step 3 — Beat the Butter and Sugar Until Creamy
This is arguably the most important step in the entire recipe. Add your room temperature butter and granulated sugar to the bowl of your stand mixer fitted with the paddle attachment. Beat on medium-high speed for 3 to 5 minutes until light and fluffy.
You’re looking for a very specific result: the mixture should turn pale — almost white — and increase noticeably in volume. What you’re doing here is forcing air into the fat, and that air is what gives your cake its light, fluffy structure. Don’t rush this step. If you stop too early, your cake will be denser than it should be.
Scrape down the sides of the bowl halfway through to make sure everything is incorporated evenly.
Step 4 — Add the Eggs and Vanilla
With your mixer running on medium speed, add your eggs one at a time. Wait for each egg to be fully incorporated before adding the next. After all four eggs are in, add your vanilla extract and mix for another 30 seconds.
Adding eggs too quickly, or all at once, can break the emulsion you’ve worked to build — resulting in a curdled-looking batter and ultimately a denser cake.
Step 5 — Add Wet and Dry Ingredients Alternately
Reduce your mixer to low speed. Add your dry ingredient mixture and milk in alternating additions — start with one-third of the flour, then half the milk, then another third of the flour, the remaining milk, and finish with the last of the flour.
This alternating method prevents the gluten in your flour from becoming overdeveloped, which is what makes cakes tough. After your last addition of flour, mix only until just combined — a few streaks of flour are perfectly fine at this point.
Finally, add your sour cream and vegetable oil and fold them in gently using your rubber spatula. This is the moment where you must resist the urge to keep mixing.
Step 6 — Bake the Cake
Divide the batter as evenly as possible between your two prepared pans. If you have a kitchen scale, weigh them — it’s the easiest way to guarantee even layers.
Slide your pans into the oven and bake for 28 to 33 minutes. At the 28-minute mark, open the oven and insert a toothpick into the center of one layer. If it comes out clean or with just a couple of moist crumbs, your cake is done. If it comes out with wet batter on it, give it another 3 to 5 minutes.
Do not open the oven door before the 20-minute mark. The cake needs that initial burst of steady heat to set its structure. Opening too early causes it to sink in the center.
Step 7 — Cool and Frost
Cooling Tips
Let your cakes cool inside the pans for exactly 10 minutes after removing them from the oven. Then run a thin knife or offset spatula around the edges, invert them onto your cooling rack, and peel off the parchment paper.
Allow the layers to cool completely — at least 1 hour at room temperature — before you even think about frosting. Frosting a warm cake is one of the most common baking mistakes. The heat melts your frosting, it slides off, and you end up with a sad, messy situation that could have been avoided entirely.
Suggested Frosting Options
- Classic vanilla buttercream — the most loved pairing, rich and sweet
- Cream cheese frosting — slightly tangy, incredibly creamy
- Swiss meringue buttercream — silky, less sweet, and beautifully smooth
- Whipped cream frosting — light and airy, ideal for summer
Pro Tips for the Moistest, Fluffiest Vanilla Cake
Before Baking
Measure your flour correctly. This is the single most common baking error. If you scoop your measuring cup directly into the flour bag, you compact the flour and end up using significantly more than the recipe calls for — which leads directly to a dry, dense cake. Instead, gently spoon the flour into a measuring cup and level the top with a straight edge.
Test your baking powder. Drop a small amount into a cup of hot water.A vigorous bubbling action means it’s still active. If it does nothing, throw it away and buy fresh. Old baking powder is responsible for more flat, sad cakes than almost any other single cause.
Use cake strips. These are fabric strips that you soak in water and wrap around your cake pans before baking. They regulate the temperature of the pan edges, so the outer part of your batter doesn’t set faster than the center — resulting in flat, level layers with no domed top.
During Baking
- Resist opening the oven until at least 20 minutes have passed
- Rotate your pans at the halfway point if you know your oven has hot spots
- Invest in an oven thermometer — most home ovens run 10 to 25 degrees off from what the dial says
After Baking
- Brush your cooled cake layers with a simple syrup (equal parts sugar and water, heated until dissolved) for an extra layer of moisture
- Wrap cooled layers in plastic wrap and refrigerate overnight before frosting — the texture actually improves significantly after resting
- Apply a thin crumb coat of frosting first, then refrigerate for 15 minutes before the final layer — this traps all the loose crumbs and gives you a cleaner finish
Vanilla Buttercream Frosting Recipe
Frosting Ingredients Table
| Ingredient | Quantity | Notes |
|---|---|---|
| Unsalted butter | 1 cup (2 sticks) | Room temperature |
| Powdered sugar | 4 cups | Sifted |
| Heavy cream | 3–4 tbsp | Adjust for consistency |
| Pure vanilla extract | 2 tsp | |
| Salt | A pinch | Balances sweetness |
Frosting Method
- Beat your butter alone for about 2 minutes until it’s pale and creamy
- Add the powdered sugar one cup at a time, mixing on low speed after each addition. to prevent a cloud of sugar dust
- Pour in the vanilla extract and 3 tablespoons of heavy cream
- Increase speed to medium-high and beat for 2 to 3 minutes until the frosting is fluffy and smooth
- Adjust the consistency by adding more cream to soften it or more powdered sugar to stiffen it
A pinch of salt at the end cuts through the sweetness and makes the vanilla flavor come forward more clearly. Don’t skip it.
Variations of This Vanilla Cake Recipe
Once you’ve mastered the base recipe, you have a versatile canvas to work from. Here are some directions worth exploring:
Flavor Variations
- Lemon Vanilla Cake — add the zest of two lemons and a tablespoon of lemon juice to the batter
- Almond Vanilla Cake — replace 1 teaspoon of vanilla with almond extract for a warm, nutty flavor
- Funfetti Cake — fold ½ cup of rainbow sprinkles into the finished batter before pouring into pans
- Brown Butter Vanilla Cake — melt and cook your butter until it turns golden and smells nutty, then cool before using; the flavor depth is remarkable
Dietary Variations
- Gluten-Free — substitute a quality 1:1 gluten-free flour blend; results are very close to the original
- Dairy-Free — use vegan butter and oat milk or almond milk in equal quantities
- Vegan — replace each egg with a flax egg (1 tablespoon ground flaxseed + 3 tablespoons water, rested for 5 minutes)
- Lower Sugar — coconut sugar works well as a direct substitute and adds a subtle caramel note
Cake Format Variations
| Format | Pan Size | Bake Time |
|---|---|---|
| Standard layer cake | Two 9-inch rounds | 28–33 minutes |
| Cupcakes | Standard muffin tin | 18–20 minutes |
| Sheet cake | 9×13 pan | 35–40 minutes |
| Bundt cake | Standard Bundt pan | 45–50 minutes |
| Three-layer cake | Three 8-inch rounds | 22–26 minutes |
How to Store Your Vanilla Cake
Storage Guide Table
| Method | Duration | Tips |
|---|---|---|
| Room temperature (covered) | 2–3 days | Keep away from heat and direct light |
| Refrigerator (airtight) | Up to 5–6 days | Bring to room temp before serving |
| Freezer (unfrosted layers) | Up to 3 months | Wrap in plastic wrap + aluminum foil |
| Freezer (frosted slices) | Up to 2 months | Flash freeze on a tray first |
Always cover any cut edges of your cake — exposed cake dries out quickly. A piece of plastic wrap pressed directly onto the cut surface works perfectly until your next slice.
Troubleshooting Common Vanilla Cake Problems
Even experienced bakers hit snags. Here’s how to diagnose and fix the most common issues:
Problem & Solution Table
| Problem | Likely Cause | Solution |
|---|---|---|
| Cake is too dense | Overmixing or too much flour | Mix until just combined; spoon-measure flour |
| Cake didn’t rise | Old leavening or oven too cold | Test baking powder; use oven thermometer |
| Cake is dry | Overbaked or excess flour | Check at minimum bake time; measure carefully |
| Cake sank in the middle | Underbaked or oven door opened early | Test with toothpick; don’t open door before 20 min |
| Cake stuck to pan | Insufficient pan prep | Always grease + parchment + flour |
| Uneven layers | Uneven batter distribution | Weigh batter; rotate pans halfway through |
Nutrition Information (Per Slice, Unfrosted)
Approximate Nutritional Values
| Nutrient | Per Slice (1/12 of cake) |
|---|---|
| Calories | ~380 kcal |
| Total Fat | 18g |
| Saturated Fat | 10g |
| Carbohydrates | 52g |
| Sugar | 35g |
| Protein | 5g |
| Sodium | 210mg |
Values are approximate. Frosting will add roughly 150–200 additional calories per slice depending on the type and quantity used.
Frequently Asked Questions — Vanilla Cake Recipe
Q: Can I make this vanilla cake recipe ahead of time?
Yes, and it actually benefits from it. Bake your layers up to 2 days in advance, wrap them tightly in plastic wrap, and store at room temperature or in the refrigerator. Frost on the day you plan to serve for the best presentation.
Q: Why is my vanilla cake dry even though I followed the recipe exactly?
The most likely culprits are overbaking or packing too much flour into your measuring cup. Even an extra 2 or 3 tablespoons of flour can noticeably dry out your crumb. Always spoon your flour and level it, and start checking your cake at the earliest suggested bake time.
Q: What is the best vanilla extract to use for this vanilla cake recipe?
Pure vanilla extract every time. Nielsen-Massey, McCormick Pure, and Heilala are consistently strong performers. If you want to go a step further, vanilla bean paste offers an even more intense flavor and those beautiful flecks of vanilla throughout your cake.
Q: Can I turn this vanilla cake recipe into cupcakes?
Absolutely. Fill your lined cupcake pan ⅔ full (no more than that, or they’ll overflow) and bake at 350°F for 18 to 20 minutes. This recipe makes approximately 24 standard-sized cupcakes.
Q: How do I make my vanilla cake extra moist?
Three things make the biggest difference: use room temperature ingredients, add sour cream to your batter, and brush your cooled cake layers with simple syrup before frosting. All three together and your cake will stay moist for days.
Q: Can I make this vanilla cake recipe without a mixer?
You can, though it takes more effort and the result may be slightly denser. Cream the butter and sugar by hand using a wooden spoon — aim for about 5 to 7 minutes of vigorous mixing. A whisk works for the eggs and wet ingredients.
Q: What frosting goes best with a vanilla cake recipe?
Classic vanilla buttercream is the crowd favorite, but cream cheese frosting brings a pleasant contrast with its light tang. For a more refined, less sugary option, Swiss meringue buttercream is beautiful both in taste and texture.
Q: Can I double this recipe?
Yes. Double every ingredient proportionally. The bake time remains approximately the same — just check at the minimum time listed and go from there. You’ll get enough batter for four 9-inch layers or one very generous 9×13 sheet cake.
Conclusion
Here’s the honest truth about this vanilla cake recipe: the magic isn’t in secret ingredients or complicated techniques. It’s in understanding why each step matters — and then trusting the process enough to follow through.
When you use real vanilla extract, measure your flour carefully, cream your butter long enough, and give your cake adequate time to cool before frosting, you’re not just following a recipe. You’re developing an instinct for baking that will carry into everything else you make.
Your first attempt might not be perfect. That’s expected and completely fine. The second will be better. And by the third, you’ll be the person other people call when they want a cake that actually tastes like something worth celebrating.
So go ahead — get your butter out of the fridge, preheat that oven, and start baking. And when you do, share how it turned out. Leave a comment below with your results, tag us in your photos, or let us know which variation you tried first. This recipe belongs to you now — make it yours. 🎂